并不包含全部视频内容,大部分都按照操作文档来手搓代码,资料,代码都上传git。
〇、实际代码
0.1 Result封装
package com.sky.result;import lombok.Data;import java.io.Serializable;/*** 后端统一返回结果* @param <T>*/
@Data
public class Result<T> implements Serializable {private Integer code; //编码:1成功,0和其它数字为失败private String msg; //错误信息private T data; //数据public static <T> Result<T> success() {Result<T> result = new Result<T>();result.code = 1;return result;}public static <T> Result<T> success(T object) {Result<T> result = new Result<T>();result.data = object;result.code = 1;return result;}public static <T> Result<T> error(String msg) {Result result = new Result();result.msg = msg;result.code = 0;return result;}}
0.2 全局异常处理
package com.sky.handler;import com.sky.exception.BaseException;
import com.sky.result.Result;
import lombok.extern.slf4j.Slf4j;
import org.springframework.web.bind.annotation.ExceptionHandler;
import org.springframework.web.bind.annotation.RestControllerAdvice;/*** 全局异常处理器,处理项目中抛出的业务异常*/
@RestControllerAdvice
@Slf4j
public class GlobalExceptionHandler {/*** 捕获业务异常* @param ex* @return*/@ExceptionHandlerpublic Result exceptionHandler(BaseException ex){log.error("异常信息:{}", ex.getMessage());return Result.error(ex.getMessage());}}
参数BaseException,我们自定义的异常都是BaseException的子类。BaseException继承RuntimeException运行时异常。
0.3 拦截器-令牌校验
校验令牌,令牌校验失败,就会抛出异常,如果抛出异常,就会设置响应状态码为401
package com.sky.interceptor;import com.sky.constant.JwtClaimsConstant;
import com.sky.properties.JwtProperties;
import com.sky.utils.JwtUtil;
import io.jsonwebtoken.Claims;
import lombok.extern.slf4j.Slf4j;
import org.springframework.beans.factory.annotation.Autowired;
import org.springframework.stereotype.Component;
import org.springframework.web.method.HandlerMethod;
import org.springframework.web.servlet.HandlerInterceptor;
import javax.servlet.http.HttpServletRequest;
import javax.servlet.http.HttpServletResponse;/*** jwt令牌校验的拦截器*/
@Component
@Slf4j
public class JwtTokenAdminInterceptor implements HandlerInterceptor {@Autowiredprivate JwtProperties jwtProperties;/*** 校验jwt** @param request* @param response* @param handler* @return* @throws Exception*/public boolean preHandle(HttpServletRequest request, HttpServletResponse response, Object handler) throws Exception {//判断当前拦截到的是Controller的方法还是其他资源if (!(handler instanceof HandlerMethod)) {//当前拦截到的不是动态方法,直接放行return true;}//1、从请求头中获取令牌String token = request.getHeader(jwtProperties.getAdminTokenName());//2、校验令牌try {log.info("jwt校验:{}", token);Claims claims = JwtUtil.parseJWT(jwtProperties.getAdminSecretKey(), token);Long empId = Long.valueOf(claims.get(JwtClaimsConstant.EMP_ID).toString());log.info("当前员工id:{}", empId);//3、通过,放行return true;} catch (Exception ex) {//4、不通过,响应401状态码response.setStatus(401);return false;}}
}
0.4 ThreadLocal封装
package com.sky.context;public class BaseContext {public static ThreadLocal<Long> threadLocal = new ThreadLocal<>();public static void setCurrentId(Long id) {threadLocal.set(id);}public static Long getCurrentId() {return threadLocal.get();}public static void removeCurrentId() {threadLocal.remove();}}
0.5 对象转换器
java序列化与反序列化,将指定的类型转为指定的格式。0.6中将会用到这个对象。
package com.sky.json;import com.fasterxml.jackson.databind.DeserializationFeature;
import com.fasterxml.jackson.databind.ObjectMapper;
import com.fasterxml.jackson.databind.module.SimpleModule;
import com.fasterxml.jackson.datatype.jsr310.deser.LocalDateDeserializer;
import com.fasterxml.jackson.datatype.jsr310.deser.LocalDateTimeDeserializer;
import com.fasterxml.jackson.datatype.jsr310.deser.LocalTimeDeserializer;
import com.fasterxml.jackson.datatype.jsr310.ser.LocalDateSerializer;
import com.fasterxml.jackson.datatype.jsr310.ser.LocalDateTimeSerializer;
import com.fasterxml.jackson.datatype.jsr310.ser.LocalTimeSerializer;import java.time.LocalDate;
import java.time.LocalDateTime;
import java.time.LocalTime;
import java.time.format.DateTimeFormatter;import static com.fasterxml.jackson.databind.DeserializationFeature.FAIL_ON_UNKNOWN_PROPERTIES;/*** 对象映射器:基于jackson将Java对象转为json,或者将json转为Java对象* 将JSON解析为Java对象的过程称为 [从JSON反序列化Java对象]* 从Java对象生成JSON的过程称为 [序列化Java对象到JSON]*/
public class JacksonObjectMapper extends ObjectMapper {public static final String DEFAULT_DATE_FORMAT = "yyyy-MM-dd";//public static final String DEFAULT_DATE_TIME_FORMAT = "yyyy-MM-dd HH:mm:ss";public static final String DEFAULT_DATE_TIME_FORMAT = "yyyy-MM-dd HH:mm";public static final String DEFAULT_TIME_FORMAT = "HH:mm:ss";public JacksonObjectMapper() {super();//收到未知属性时不报异常this.configure(FAIL_ON_UNKNOWN_PROPERTIES, false);//反序列化时,属性不存在的兼容处理this.getDeserializationConfig().withoutFeatures(DeserializationFeature.FAIL_ON_UNKNOWN_PROPERTIES);SimpleModule simpleModule = new SimpleModule().addDeserializer(LocalDateTime.class, new LocalDateTimeDeserializer(DateTimeFormatter.ofPattern(DEFAULT_DATE_TIME_FORMAT))).addDeserializer(LocalDate.class, new LocalDateDeserializer(DateTimeFormatter.ofPattern(DEFAULT_DATE_FORMAT))).addDeserializer(LocalTime.class, new LocalTimeDeserializer(DateTimeFormatter.ofPattern(DEFAULT_TIME_FORMAT))).addSerializer(LocalDateTime.class, new LocalDateTimeSerializer(DateTimeFormatter.ofPattern(DEFAULT_DATE_TIME_FORMAT))).addSerializer(LocalDate.class, new LocalDateSerializer(DateTimeFormatter.ofPattern(DEFAULT_DATE_FORMAT))).addSerializer(LocalTime.class, new LocalTimeSerializer(DateTimeFormatter.ofPattern(DEFAULT_TIME_FORMAT)));//注册功能模块 例如,可以添加自定义序列化器和反序列化器this.registerModule(simpleModule);}
}
0.6 SpringMVC消息 转换器
用于统一时间的格式。
MappingJackson2HttpMessageConverter对象有个很相似,不要倒错包。
在配置类WebMvcConfiguration中添加消息转换器。
/*** 扩展Spring MVC框架的消息转化器* @param converters*/@Overrideprotected void extendMessageConverters(List<HttpMessageConverter<?>> converters) {log.info("扩展消息转换器...");//converters中存取了全部的转换对象,有很多//创建一个消息转换器对象MappingJackson2HttpMessageConverter converter = new MappingJackson2HttpMessageConverter();需要为消息转换器设置一个对象转换器,对象转换器可以将Java对象序列化为json数据converter.setObjectMapper(new JacksonObjectMapper());//将自己的消息转化器加入容器中,默认是最后的优先级,所以要设置优先级最先执行。converters.add(0,converter);}0.7 AOP公共字段填充
技术点:枚举、注解、AOP、反射
0.7.1 自定义注解 AutoFill
package com.sky.annotation;import com.sky.enumeration.OperationType;
import java.lang.annotation.ElementType;
import java.lang.annotation.Retention;
import java.lang.annotation.RetentionPolicy;
import java.lang.annotation.Target;/*** 自定义注解,用于标识某个方法需要进行功能字段自动填充处理*/
@Target(ElementType.METHOD)
@Retention(RetentionPolicy.RUNTIME)
public @interface AutoFill {//数据库操作类型:UPDATE INSERTOperationType value();
}
0.7.2 定义枚举(操作的类型)
insert和update操作的属性不同。
package com.sky.enumeration;/*** 数据库操作类型*/
public enum OperationType {/*** 更新操作*/UPDATE,/*** 插入操作*/INSERT
}
0.7.3 定义切面类
切入点表达式+通知,进行逻辑操作。
package com.sky.aspect;import com.sky.annotation.AutoFill;
import com.sky.constant.AutoFillConstant;
import com.sky.context.BaseContext;
import com.sky.enumeration.OperationType;
import lombok.extern.slf4j.Slf4j;
import org.aspectj.lang.JoinPoint;
import org.aspectj.lang.annotation.Aspect;
import org.aspectj.lang.annotation.Before;
import org.aspectj.lang.annotation.Pointcut;
import org.aspectj.lang.reflect.MethodSignature;
import org.springframework.stereotype.Component;
import java.lang.reflect.Method;
import java.time.LocalDateTime;/*** 自定义切面,实现公共字段自动填充处理逻辑*/
@Aspect
@Component
@Slf4j
public class AutoFillAspect {/*** 切入点*/@Pointcut("execution(* com.sky.mapper.*.*(..)) && @annotation(com.sky.annotation.AutoFill)")public void autoFillPointCut(){}/*** 前置通知,在通知中进行公共字段的赋值*/@Before("autoFillPointCut()")public void autoFill(JoinPoint joinPoint){log.info("开始进行公共字段自动填充...");//获取到当前被拦截的方法上的数据库操作类型MethodSignature signature = (MethodSignature) joinPoint.getSignature();//方法签名对象AutoFill autoFill = signature.getMethod().getAnnotation(AutoFill.class);//获得方法上的注解对象OperationType operationType = autoFill.value();//获得数据库操作类型//获取到当前被拦截的方法的参数--实体对象Object[] args = joinPoint.getArgs();if(args == null || args.length == 0){return;}Object entity = args[0];//准备赋值的数据LocalDateTime now = LocalDateTime.now();Long currentId = BaseContext.getCurrentId();//根据当前不同的操作类型,为对应的属性通过反射来赋值if(operationType == OperationType.INSERT){//为4个公共字段赋值try {Method setCreateTime = entity.getClass().getDeclaredMethod(AutoFillConstant.SET_CREATE_TIME, LocalDateTime.class);Method setCreateUser = entity.getClass().getDeclaredMethod(AutoFillConstant.SET_CREATE_USER, Long.class);Method setUpdateTime = entity.getClass().getDeclaredMethod(AutoFillConstant.SET_UPDATE_TIME, LocalDateTime.class);Method setUpdateUser = entity.getClass().getDeclaredMethod(AutoFillConstant.SET_UPDATE_USER, Long.class);//通过反射为对象属性赋值setCreateTime.invoke(entity,now);setCreateUser.invoke(entity,currentId);setUpdateTime.invoke(entity,now);setUpdateUser.invoke(entity,currentId);} catch (Exception e) {e.printStackTrace();}}else if(operationType == OperationType.UPDATE){//为2个公共字段赋值try {Method setUpdateTime = entity.getClass().getDeclaredMethod(AutoFillConstant.SET_UPDATE_TIME, LocalDateTime.class);Method setUpdateUser = entity.getClass().getDeclaredMethod(AutoFillConstant.SET_UPDATE_USER, Long.class);//通过反射为对象属性赋值setUpdateTime.invoke(entity,now);setUpdateUser.invoke(entity,currentId);} catch (Exception e) {e.printStackTrace();}}}
}
0.7.4 给方法添加注解
给添加和修改的方法添加注解,来进行捕获。
注解中的value属性,就是枚举类型,来标记是什么操作。
package com.sky.mapper;@Mapper
public interface CategoryMapper {/*** 插入数据* @param category*/@Insert("insert into category(type, name, sort, status, create_time, update_time, create_user, update_user)" +" VALUES" +" (#{type}, #{name}, #{sort}, #{status}, #{createTime}, #{updateTime}, #{createUser}, #{updateUser})")@AutoFill(value = OperationType.INSERT)void insert(Category category);/*** 根据id修改分类* @param category*/@AutoFill(value = OperationType.UPDATE)void update(Category category);}
0.8 OSS对象存储
出现过的问题:
上传成功了,但是回显时图片不显示。其实上传没问题。回显的地址其实也没问题。原因在于alioss权限要设置为公共读写,不要设置私有,设置私有后。上传成功后,就会在图片地址后面拼接一些英文数字字符串。这样就导致回显时,因为没有后面拼接的字符串,他就会加载不出来图片。
1定义OSS相关配置
application-dev.yml
sky:alioss:endpoint: oss-cn-hangzhou.aliyuncs.comaccess-key-id: LTAI5tPeFLzsPPT8gG3LPW64access-key-secret: U6k1brOZ8gaOIXv3nXbulGTUzy6Pd7bucket-name: sky-take-outapplication.yml
sky:alioss:endpoint: ${sky.alioss.endpoint}access-key-id: ${sky.alioss.access-key-id}access-key-secret: ${sky.alioss.access-key-secret}bucket-name: ${sky.alioss.bucket-name}2读取OSS配置
用于封装这四个属性,封装yml中的值。
package com.sky.properties;import lombok.Data;
import org.springframework.boot.context.properties.ConfigurationProperties;
import org.springframework.stereotype.Component;@Component
@ConfigurationProperties(prefix = "sky.alioss")
@Data
public class AliOssProperties {private String endpoint;private String accessKeyId;private String accessKeySecret;private String bucketName;}
3). 生成OSS工具类对象
创建配置类,项目启动时,创建OSSutil对象(并加入基本的四个属性值)。
要加@Bean,要不然后面注入不进去,扫描不到。
package com.sky.config;import com.sky.properties.AliOssProperties;
import com.sky.utils.AliOssUtil;
import lombok.extern.slf4j.Slf4j;
import org.springframework.boot.autoconfigure.condition.ConditionalOnMissingBean;
import org.springframework.context.annotation.Bean;
import org.springframework.context.annotation.Configuration;/*** 配置类,用于创建AliOssUtil对象*/
@Configuration
@Slf4j
public class OssConfiguration {@Bean@ConditionalOnMissingBeanpublic AliOssUtil aliOssUtil(AliOssProperties aliOssProperties){log.info("开始创建阿里云文件上传工具类对象:{}",aliOssProperties);return new AliOssUtil(aliOssProperties.getEndpoint(),aliOssProperties.getAccessKeyId(),aliOssProperties.getAccessKeySecret(),aliOssProperties.getBucketName());}
}
工具类封装
第一个参数是byte数组,就是文件对象封装的数组。
第二个参数,就是在服务器中存储的名字。
package com.sky.utils;import com.aliyun.oss.ClientException;
import com.aliyun.oss.OSS;
import com.aliyun.oss.OSSClientBuilder;
import com.aliyun.oss.OSSException;
import lombok.AllArgsConstructor;
import lombok.Data;
import lombok.extern.slf4j.Slf4j;
import java.io.ByteArrayInputStream;@Data
@AllArgsConstructor
@Slf4j
public class AliOssUtil {private String endpoint;private String accessKeyId;private String accessKeySecret;private String bucketName;/*** 文件上传** @param bytes* @param objectName* @return*/public String upload(byte[] bytes, String objectName) {// 创建OSSClient实例。OSS ossClient = new OSSClientBuilder().build(endpoint, accessKeyId, accessKeySecret);try {// 创建PutObject请求。ossClient.putObject(bucketName, objectName, new ByteArrayInputStream(bytes));} catch (OSSException oe) {System.out.println("Caught an OSSException, which means your request made it to OSS, "+ "but was rejected with an error response for some reason.");System.out.println("Error Message:" + oe.getErrorMessage());System.out.println("Error Code:" + oe.getErrorCode());System.out.println("Request ID:" + oe.getRequestId());System.out.println("Host ID:" + oe.getHostId());} catch (ClientException ce) {System.out.println("Caught an ClientException, which means the client encountered "+ "a serious internal problem while trying to communicate with OSS, "+ "such as not being able to access the network.");System.out.println("Error Message:" + ce.getMessage());} finally {if (ossClient != null) {ossClient.shutdown();}}//文件访问路径规则 https://BucketName.Endpoint/ObjectNameStringBuilder stringBuilder = new StringBuilder("https://");stringBuilder.append(bucketName).append(".").append(endpoint).append("/").append(objectName);log.info("文件上传到:{}", stringBuilder.toString());return stringBuilder.toString();}
}
4). 定义文件上传接口
注入工具类,完成逻辑开发
package com.sky.controller.admin;import com.sky.constant.MessageConstant;
import com.sky.result.Result;
import com.sky.utils.AliOssUtil;
import io.swagger.annotations.Api;
import io.swagger.annotations.ApiOperation;
import lombok.extern.slf4j.Slf4j;
import org.springframework.beans.factory.annotation.Autowired;
import org.springframework.web.bind.annotation.PostMapping;
import org.springframework.web.bind.annotation.RequestMapping;
import org.springframework.web.bind.annotation.RestController;
import org.springframework.web.multipart.MultipartFile;
import java.io.IOException;
import java.util.UUID;/*** 通用接口*/
@RestController
@RequestMapping("/admin/common")
@Api(tags = "通用接口")
@Slf4j
public class CommonController {@Autowiredprivate AliOssUtil aliOssUtil;/*** 文件上传* @param file* @return*/@PostMapping("/upload")@ApiOperation("文件上传")public Result<String> upload(MultipartFile file){log.info("文件上传:{}",file);try {//原始文件名String originalFilename = file.getOriginalFilename();//截取原始文件名的后缀   dfdfdf.pngString extension = originalFilename.substring(originalFilename.lastIndexOf("."));//构造新文件名称String objectName = UUID.randomUUID().toString() + extension;//文件的请求路径String filePath = aliOssUtil.upload(file.getBytes(), objectName);return Result.success(filePath);} catch (IOException e) {log.error("文件上传失败:{}", e);}return Result.error(MessageConstant.UPLOAD_FAILED);}
}
一、nginx相关
1.1 使用
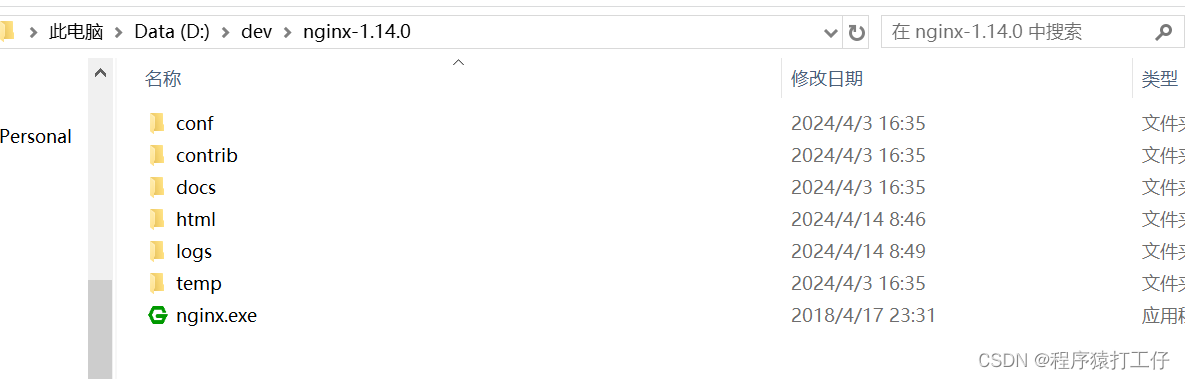
nginx.exe:启动,如果启动不成功,查看logs中的日志信息,排除一下是否是端口被占用,nginx默认是80端口。
html:打包后的代码放在此文件夹。多个前段项目都可以放进来。
只需要修改下配置文件。配置文件在conf文件夹中。

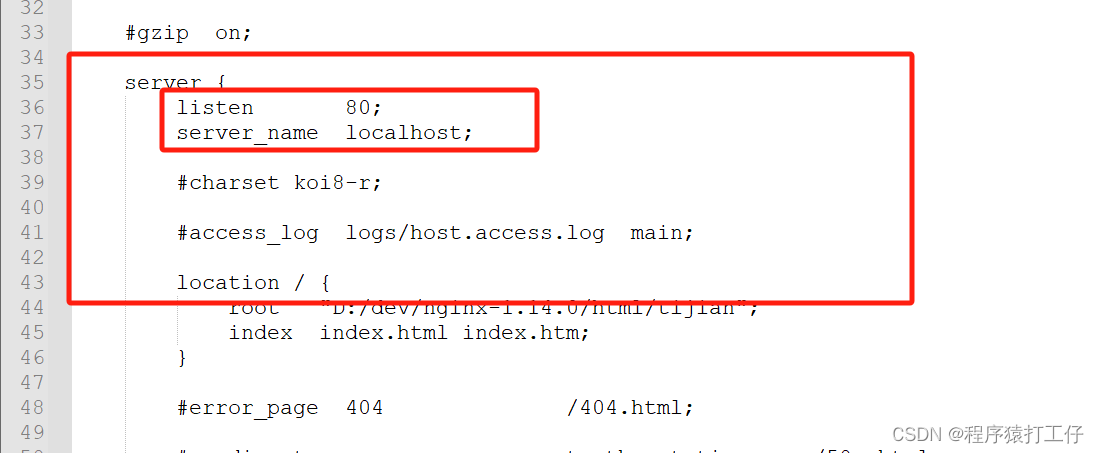
配置两个service即可,分别对应两个前端项目。
代码详情如下:
#user  nobody;
worker_processes  1;#error_log  logs/error.log;
#error_log  logs/error.log  notice;
#error_log  logs/error.log  info;#pid        logs/nginx.pid;events {worker_connections  1024;
}http {include       mime.types;default_type  application/octet-stream;#log_format  main  '$remote_addr - $remote_user [$time_local] "$request" '#                  '$status $body_bytes_sent "$http_referer" '#                  '"$http_user_agent" "$http_x_forwarded_for"';#access_log  logs/access.log  main;sendfile        on;#tcp_nopush     on;#keepalive_timeout  0;keepalive_timeout  65;#gzip  on;server {listen       80;server_name  localhost;#charset koi8-r;#access_log  logs/host.access.log  main;location / {root   "D:/dev/nginx-1.14.0/html/tijian";index  index.html index.htm;}#error_page  404              /404.html;# redirect server error pages to the static page /50x.html#error_page   500 502 503 504  /50x.html;location = /50x.html {root   html;}# proxy the PHP scripts to Apache listening on 127.0.0.1:80##location ~ \.php$ {#    proxy_pass   http://127.0.0.1;#}# pass the PHP scripts to FastCGI server listening on 127.0.0.1:9000##location ~ \.php$ {#    root           html;#    fastcgi_pass   127.0.0.1:9000;#    fastcgi_index  index.php;#    fastcgi_param  SCRIPT_FILENAME  /scripts$fastcgi_script_name;#    include        fastcgi_params;#}# deny access to .htaccess files, if Apache's document root# concurs with nginx's one##location ~ /\.ht {#    deny  all;#}}server {listen       81;server_name  localhost;#charset koi8-r;#access_log  logs/host.access.log  main;location / {root   "D:/dev/nginx-1.14.0/html/tijiancms";index  index.html index.htm;}#error_page  404              /404.html;# redirect server error pages to the static page /50x.html#error_page   500 502 503 504  /50x.html;location = /50x.html {root   html;}# proxy the PHP scripts to Apache listening on 127.0.0.1:80##location ~ \.php$ {#    proxy_pass   http://127.0.0.1;#}# pass the PHP scripts to FastCGI server listening on 127.0.0.1:9000##location ~ \.php$ {#    root           html;#    fastcgi_pass   127.0.0.1:9000;#    fastcgi_index  index.php;#    fastcgi_param  SCRIPT_FILENAME  /scripts$fastcgi_script_name;#    include        fastcgi_params;#}# deny access to .htaccess files, if Apache's document root# concurs with nginx's one##location ~ /\.ht {#    deny  all;#}}# another virtual host using mix of IP-, name-, and port-based configuration##server {#    listen       8000;#    listen       somename:8080;#    server_name  somename  alias  another.alias;#    location / {#        root   html;#        index  index.html index.htm;#    }#}# HTTPS server##server {#    listen       443 ssl;#    server_name  localhost;#    ssl_certificate      cert.pem;#    ssl_certificate_key  cert.key;#    ssl_session_cache    shared:SSL:1m;#    ssl_session_timeout  5m;#    ssl_ciphers  HIGH:!aNULL:!MD5;#    ssl_prefer_server_ciphers  on;#    location / {#        root   html;#        index  index.html index.htm;#    }#}}
1.2 反向代理和负载均衡
1.2.1 介绍

前端访问的地址和后端接口真实的地址不一致。
nginx 反向代理的好处:
-
提高访问速度
因为nginx本身可以进行缓存,如果访问的同一接口,并且做了数据缓存,nginx就直接可把数据返回,不需要真正地访问服务端,从而提高访问速度。
-
进行负载均衡
所谓负载均衡,就是把大量的请求按照我们指定的方式均衡的分配给集群中的每台服务器。
-
保证后端服务安全
因为一般后台服务地址不会暴露,所以使用浏览器不能直接访问,可以把nginx作为请求访问的入口,请求到达nginx后转发到具体的服务中,从而保证后端服务的安全。
1.2.2配置
都是在nginx.conf中进行配置。
1.2.2.1 反向代理
server{listen 80;server_name localhost;location /api/{proxy_pass http://localhost:8080/admin/; #反向代理}
}proxy_pass:该指令是用来设置代理服务器的地址,可以是主机名称,IP地址加端口号等形式。
如上代码的含义是:监听80端口号, 然后当我们访问 http://localhost:80/api/../..这样的接口的时候,它会通过 location /api/ {} 这样的反向代理到 http://localhost:8080/admin/上来。
图解:

红色区域进行替换。

1.2.2.2 负载均衡
负载均衡底层,就是使用的反向代理。
webservers就是一个ip端口组。
upstream webservers{server 192.168.100.128:8080;server 192.168.100.129:8080;
}
server{listen 80;server_name localhost;location /api/{proxy_pass http://webservers/admin;#负载均衡}
}upstream:如果代理服务器是一组服务器的话,我们可以使用upstream指令配置后端服务器组。
如上代码的含义是:监听80端口号, 然后当我们访问 http://localhost:80/api/../..这样的接口的时候,它会通过 location /api/ {} 这样的反向代理到 http://webservers/admin,根据webservers名称找到一组服务器,根据设置的负载均衡策略(默认是轮询)转发到具体的服务器。
注:upstream后面的名称可自定义,但要上下保持一致。
nginx 负载均衡策略:
| 名称 | 说明 |
|---|---|
| 轮询 | 默认方式 |
| weight | 权重方式,默认为1,权重越高,被分配的客户端请求就越多 |
| ip_hash | 依据ip分配方式,这样每个访客可以固定访问一个后端服务 |
| least_conn | 依据最少连接方式,把请求优先分配给连接数少的后端服务 |
| url_hash | 依据url分配方式,这样相同的url会被分配到同一个后端服务 |
| fair | 依据响应时间方式,响应时间短的服务将会被优先分配 |
具体配置方式:
upstream webservers{server 192.168.100.128:8080 weight=90;server 192.168.100.129:8080 weight=10;
}
upstream webservers{ip_hash;server 192.168.100.128:8080;server 192.168.100.129:8080;
}其他的类似。
二、代码相关
2.1 build

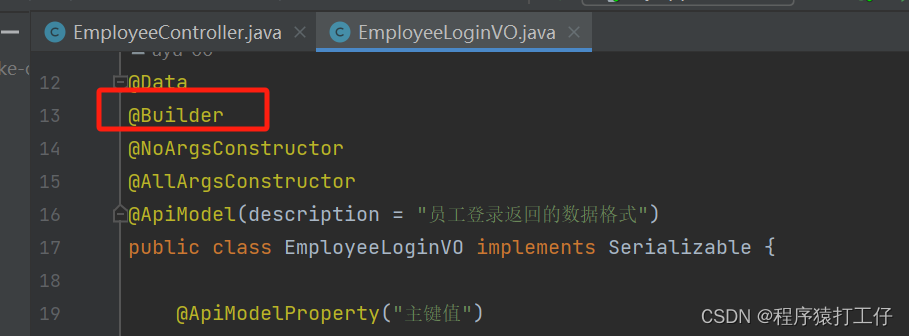
创建一个VO对象,此处使用的是builder构造器。当然去new对象也可以。但是使用builder(),在实体中要加入@Builder注解
2.2 属性配置封装
使用场景:

拿到属性类中的实际值。jwtProperties 是上方依赖注入的。

这是一个属性类。真正的结果,在yml配置文件中。

数据封装在配置文件中。
2.3 登录md5密码加密
思路:
用户输入账号密码,传输到后端。后端根据用户名查询,返回整条user数据(判断用户是否存在)。在使用传输过来的密码,将此密码进行md5加密与查询出来的数据比对。(用户存在,判断密码是否正确)
public Employee login(EmployeeLoginDTO employeeLoginDTO) {String username = employeeLoginDTO.getUsername();String password = employeeLoginDTO.getPassword();//1、根据用户名查询数据库中的数据Employee employee = employeeMapper.getByUsername(username);//2、处理各种异常情况(用户名不存在、密码不对、账号被锁定)if (employee == null) {//账号不存在throw new AccountNotFoundException(MessageConstant.ACCOUNT_NOT_FOUND);}//密码比对//需要进行md5加密,然后再进行比对password = DigestUtils.md5DigestAsHex(password.getBytes());if (!password.equals(employee.getPassword())) {//密码错误throw new PasswordErrorException(MessageConstant.PASSWORD_ERROR);}if (employee.getStatus() == StatusConstant.DISABLE) {//账号被锁定throw new AccountLockedException(MessageConstant.ACCOUNT_LOCKED);}//3、返回实体对象return employee;}DigestUtils是spring提供的md5加密。
2.4 异常处理(全局异常处理器)
代码中尽量避免字符串的出现,所以都维护在常量类中。
操作步骤
1.将抛出的异常的类名复制出来,方便在全局异常处理器中进行捕获。
SQLIntegrityConstraintViolationException
2. 重写exceptionHandler方法,别忘了加上@ExceptionHandler注解。
3.代码实现捕获指定异常。
代码:
第二个方法是。
package com.sky.handler;import com.sky.constant.MessageConstant;
import com.sky.exception.BaseException;
import com.sky.result.Result;
import lombok.extern.slf4j.Slf4j;
import org.springframework.web.bind.annotation.ExceptionHandler;
import org.springframework.web.bind.annotation.RestControllerAdvice;import java.sql.SQLIntegrityConstraintViolationException;/*** 全局异常处理器,处理项目中抛出的业务异常*/
@RestControllerAdvice
@Slf4j
public class GlobalExceptionHandler {/*** 捕获业务异常** @param ex* @return*/@ExceptionHandlerpublic Result exceptionHandler(BaseException ex) {log.error("异常信息:{}", ex.getMessage());return Result.error(ex.getMessage());}/*** 捕获用户名重复异常(添加用户操作)* @param ex* @return*/@ExceptionHandlerpublic Result exceptionHandler(SQLIntegrityConstraintViolationException ex) {// Duplicate entry 'zhangsan' for key 'employee.idx_username'log.error("异常信息:{}", ex.getMessage());//提示前端 用户名已经存在,并且将用户名取出来String message = ex.getMessage();if (message.contains("Duplicate entry")) {//空格进行分隔,取出第三个字符串,就是用户名String[] strArray = message.split(" ");String msg = strArray[2] + MessageConstant.YI_CUN_ZAI;//拼接已存在return Result.error(msg);}//如果不是,返回未知错误。return Result.error(MessageConstant.UNKNOWN_ERROR);}}
2.5 ThreadLocal的使用
1.存入
//将当前员工id存入BaseContext中。BaseContext是对ThreadLocal的封装
BaseContext.setCurrentId(empId);
package com.sky.interceptor;import com.sky.constant.JwtClaimsConstant;
import com.sky.context.BaseContext;
import com.sky.properties.JwtProperties;
import com.sky.utils.JwtUtil;
import io.jsonwebtoken.Claims;
import lombok.extern.slf4j.Slf4j;
import org.springframework.beans.factory.annotation.Autowired;
import org.springframework.stereotype.Component;
import org.springframework.web.method.HandlerMethod;
import org.springframework.web.servlet.HandlerInterceptor;
import javax.servlet.http.HttpServletRequest;
import javax.servlet.http.HttpServletResponse;/*** jwt令牌校验的拦截器*/
@Component
@Slf4j
public class JwtTokenAdminInterceptor implements HandlerInterceptor {@Autowiredprivate JwtProperties jwtProperties;/*** 校验jwt** @param request* @param response* @param handler* @return* @throws Exception*/public boolean preHandle(HttpServletRequest request, HttpServletResponse response, Object handler) throws Exception {//判断当前拦截到的是Controller的方法还是其他资源if (!(handler instanceof HandlerMethod)) {//当前拦截到的不是动态方法,直接放行return true;}//1、从请求头中获取令牌String token = request.getHeader(jwtProperties.getAdminTokenName());//2、校验令牌try {log.info("jwt校验:{}", token);Claims claims = JwtUtil.parseJWT(jwtProperties.getAdminSecretKey(), token);Long empId = Long.valueOf(claims.get(JwtClaimsConstant.EMP_ID).toString());log.info("当前员工id:{}", empId);//将当前员工id存入BaseContext中。BaseContext是对ThreadLocal的封装BaseContext.setCurrentId(empId);//3、通过,放行return true;} catch (Exception ex) {//4、不通过,响应401状态码response.setStatus(401);return false;}}
}
2.取出
serviceImpl中,取出 BaseContext.getCurrentId()
@Overridepublic void insertEmp(EmployeeDTO employeeDTO) {Employee employee = Employee.builder().createTime(LocalDateTime.now()).updateTime(LocalDateTime.now())//设置默认密码123456,并进行加密.password(DigestUtils.md5DigestAsHex(PasswordConstant.DEFAULT_PASSWORD.getBytes()))//设置状态,默认为1.status(StatusConstant.ENABLE)//从BaseContext中获取存储的信息.createUser(BaseContext.getCurrentId()).updateUser(BaseContext.getCurrentId()).build();BeanUtils.copyProperties(employeeDTO, employee);employeeMapper.insertEmp(employee);}2.6 日期的格式

解决方式:
1). 方式一
在属性上加上注解,对日期进行格式化

但这种方式,需要在每个时间属性上都要加上该注解,使用较麻烦,不能全局处理。
2). 方式二(推荐 )
在WebMvcConfiguration中扩展SpringMVC的消息转换器,统一对日期类型进行格式处理
/*** 扩展Spring MVC框架的消息转化器* @param converters*/protected void extendMessageConverters(List<HttpMessageConverter<?>> converters) {log.info("扩展消息转换器...");//创建一个消息转换器对象MappingJackson2HttpMessageConverter converter = new MappingJackson2HttpMessageConverter();//需要为消息转换器设置一个对象转换器,对象转换器可以将Java对象序列化为json数据converter.setObjectMapper(new JacksonObjectMapper());//将自己的消息转化器加入容器中converters.add(0,converter);}对象转换器就是0.5

三、常识规范理解
3.1 dto、vo、pojo、Result
vo中v联想view,所示是返回给前端想要的属性。
dto是前端给后端传输的属性。
pojo是和数据库相对应的实体。
result规定,前后端传输都会封装为Result对象。
result其中包含:
{"code": 0,"data": {},"msg": "string"
}
3.2 log
添加@Slf4j注解后,就可以使用log.info()了。最原始的方法就是 new。
3.3 唯一约束异常
java.sql.SQLIntegrityConstraintViolationException: Duplicate entry 'zhangsan' for key 'employee.idx_username'
这个已经提示了idx_username是索引名称。Duplicate 重复。
解决办法:查看2.4
3.4 ThreadLocal存储
介绍:
ThreadLocal 并不是一个Thread,而是Thread的局部变量。 ThreadLocal为每个线程提供单独一份存储空间,具有线程隔离的效果,只有在线程内才能获取到对应的值,线程外则不能访问。
常用方法:
-
public void set(T value) 设置当前线程的线程局部变量的值
-
public T get() 返回当前线程所对应的线程局部变量的值
-
public void remove() 移除当前线程的线程局部变量
一次请求,tomcat就会给我们分配一个线程。这一个请求中线程共享数据。
例如:在拦截器中输出,controller中输出,controller调用service再调用mapper,service输出,mapper输出 的 线程id都是一致的。

我们应该在拦截器的位置将数据(例如:当前人id)存储到ThreaLocal中,方便后续直接拿取。
封装详情见:0.4
使用详情见:2.5
3.5 请求参数相关
3.5.1 query
常见与get请求,query就是路径后面拼接。
3.5.2 body(json)
常见于post请求,参数都放在请求体中
3.5.3 header
请求头参数,token。在请求是携带在请求头中。
3.6 @JsonFormat
次注解用于格式化日期
@JsonFormat(pattern = "yyyy-MM-dd HH:mm:ss")
private LocalDateTime createTime;

3.7 Mybatis别名
mybatis:#mapper配置文件mapper-locations: classpath:mapper/*.xmltype-aliases-package: com.sky.entity 
参数类型,就可以直接写别名
3.8 数据类型
`id` bigint NOT NULL AUTO_INCREMENT COMMENT '主键',
private Long id; 实体中用Long来对应。
3.9 路径参数+query参数
因为是post请求,所以参数要放在body中。

路径参数与http字符串参数 。

接口中id是Long类型,所以接口文档中用interger,不能用string,也不能用Integer(id会为null)。
3.10 相关注解
@PathVariable 路径参数
@RequestBody 前端传输json格式
3.11 yml配置属性

四、配置相关
4.1 mybatis
4.1.1 驼峰命名
mybatis:configuration:#开启驼峰命名map-underscore-to-camel-case: true五、状态码
5.1 401
401状态码是HTTP协议中的一个状态码,表示“未授权”(Unauthorized)
解决:查看请求是否进入到controller中,如果没进入,就要考虑拦截器。
可以查看token是否校验通过。
六、工具的使用
6.1 apifox
6.1.1 全局参数
 右上角可以设置环境,也可以设置全局参数,例如token。
七、优雅代码
7.1 builder
实体上要添加@Builder注解
Employee employee = Employee.builder().createTime(LocalDateTime.now()).updateTime(LocalDateTime.now())//设置默认密码123456,并进行加密.password(DigestUtils.md5DigestAsHex(PasswordConstant.DEFAULT_PASSWORD.getBytes()))//设置状态,默认为1.status(StatusConstant.ENABLE)//从BaseContext中获取存储的信息.createUser(BaseContext.getCurrentId()).updateUser(BaseContext.getCurrentId()).build();
)


)
)


)
:揭秘数据的隐藏结构)


