【1】 创建maven项目
1)目录结构
mavenhello09|---src|---|---main|---|---|---java|---|---|---resources|---|---test|---|---|---java|---|---|---resources|---pom.xml
目录结构说明:
- main/java:主程序;
- main/resources:主程序资源;
- test/java:测试程序;
- test/resources: 测试程序资源;
2)代码
package com.cmc.cd;public class Hello {public Hello(){}public String sayHello(String name) {return "hello " + name;}
}
package com.cmc.cd;import org.junit.Assert;
import org.junit.Test;/*** 单元测试案例*/
public class HelloTest {@Testpublic void testSayHello() {Hello hello = new Hello();String result = hello.sayHello("zhangsan");Assert.assertEquals("hello zhangsan", result);}
}
pom.xml
<?xml version="1.0" encoding="UTF-8"?><project xmlns="http://maven.apache.org/POM/4.0.0" xmlns:xsi="http://www.w3.org/2001/XMLSchema-instance"xsi:schemaLocation="http://maven.apache.org/POM/4.0.0 http://maven.apache.org/xsd/maven-4.0.0.xsd"><modelVersion>4.0.0</modelVersion><groupId>com.cmc.cd</groupId><artifactId>mavenhello09</artifactId><version>1.0-SNAPSHOT</version><packaging>war</packaging><name>mavenhello09 Maven Webapp</name><properties><project.build.sourceEncoding>UTF-8</project.build.sourceEncoding><maven.compiler.source>1.8</maven.compiler.source><maven.compiler.target>1.8</maven.compiler.target></properties><dependencies><dependency><groupId>junit</groupId><artifactId>junit</artifactId><version>4.11</version><scope>test</scope></dependency></dependencies><build><finalName>mavenhello09</finalName><pluginManagement><!-- lock down plugins versions to avoid using Maven defaults (may be moved to parent pom) --><plugins><plugin><artifactId>maven-clean-plugin</artifactId><version>3.1.0</version></plugin><!-- see http://maven.apache.org/ref/current/maven-core/default-bindings.html#Plugin_bindings_for_war_packaging --><plugin><artifactId>maven-resources-plugin</artifactId><version>3.0.2</version></plugin><plugin><artifactId>maven-compiler-plugin</artifactId><version>3.8.0</version></plugin><plugin><artifactId>maven-surefire-plugin</artifactId><version>2.22.1</version></plugin><plugin><artifactId>maven-war-plugin</artifactId><version>3.2.2</version></plugin><plugin><artifactId>maven-install-plugin</artifactId><version>2.5.2</version></plugin><plugin><artifactId>maven-deploy-plugin</artifactId><version>2.8.2</version></plugin></plugins></pluginManagement></build>
</project>
【2】执行maven命令
mvn clean == 清理 target文件;
mvn compile == 编译 src/main/java 里的源文件;编译主程序; 生成target/classes 文件夹;
mvn test-compile == 编译 src/test/java 里的源文件;编译测试程序;生成target/test-classes 文件夹;
mvn test == 执行测试;
mvn package == mvn compile + mvn test-compile + 打包;打包成或war 或jar到 target文件夹下;
mvn install == compile test-compile test package install
[INFO] Installing D:\workbench_idea\maven\mavenhello09\target\mavenhello09.jar to D:\software_cluster\mvn_repo\com\cmc\cd\mavenhello09\1.0-SNAPSHOT\mavenhello09-1.0-SNAPSHOT.jar
[INFO] Installing D:\workbench_idea\maven\mavenhello09\pom.xml to D:\software_cluster\mvn_repo\com\cmc\cd\mavenhello09\1.0-SNAPSHOT\mavenhello09-1.0-SNAPSHOT.pom
执行 mvn install 把 mavenhello09 安装到本地库,以便本地其他项目依赖 mavenhello09这个制品库;
【3】创建第2个java工程mavenhello15,依赖mavenhello09工程
1)目录结构

2)业务代码
package com.cmc.cd;public class HelloFriend {public HelloFriend(){}public String sayHello2Friend(String name) {Hello hello = new Hello();String str = hello.sayHello(name) + ", i am " + getMyName();return str;}public String getMyName() {return "john";}
}
3)测试程序
package com.cmc.cd;import org.junit.Assert;
import org.junit.Test;public class HelloFriendTest {@Testpublic void testHelloFriend() {HelloFriend helloFriend = new HelloFriend();String result = helloFriend.sayHello2Friend("wangwu");System.out.println(result);Assert.assertEquals("hello wangwu, i am john", result);}
}
<?xml version="1.0" encoding="UTF-8"?>
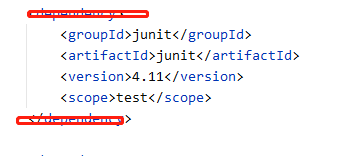
<project xmlns="http://maven.apache.org/POM/4.0.0"xmlns:xsi="http://www.w3.org/2001/XMLSchema-instance"xsi:schemaLocation="http://maven.apache.org/POM/4.0.0 http://maven.apache.org/xsd/maven-4.0.0.xsd"><modelVersion>4.0.0</modelVersion><groupId>com.cmc.cd</groupId><artifactId>mavenhello15</artifactId><version>1.0-SNAPSHOT</version><properties><maven.compiler.source>8</maven.compiler.source><maven.compiler.target>8</maven.compiler.target></properties><dependencies><dependency><groupId>com.cmc.cd</groupId><artifactId>mavenhello09</artifactId><version>1.0-SNAPSHOT</version><scope>compile</scope></dependency><dependency><groupId>junit</groupId><artifactId>junit</artifactId><version>4.11</version><scope>test</scope></dependency></dependencies>
</project>补充: 上述代码中, mavenhello15项目中的 HelloFriend 类引用(依赖)了 mavenhello09项目中的 Hello类;
【4】依赖范围 scope
1)常用范围包括, compile-编译, test-执行测试, provided-;
| 依赖范围 | 对主程序是否有效 | 对测试程序是否有效 | 是否参与打包 | 例子 |
| compile | Y | Y | Y | 框架或工具jar,spring-core |
| test | N | Y | N | junit |
| provided | Y | Y | N | servlet-api |
补充:范围为 provided 的依赖不参与打包, 因为 依赖的jar 由 tomcat 服务器提供,如serverl-api.jar; 如:
<dependency><groupId>com.cmc.cd</groupId><artifactId>mavenhello09</artifactId><version>1.0-SNAPSHOT</version><scope>compile</scope></dependency>补充: scope 默认为 compile;
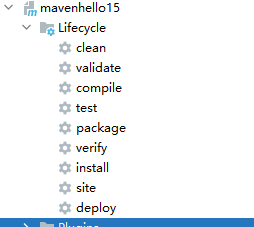
【5】生命周期-lifecycle
1)生命周期: 各个构建环节执行的顺序; 构建环节包括:
- clean:清理之前编译结果target目录下的所有文件(包括target);
- compile:编译到target目录, 包括 src/java src/resources src/test src/resources 下面的程序;
- test:测试,自动调用 junit 程序;
- package:打包, web工程打成 war包, java工程打成 jar包;
- install:安装,把打包后的 压缩文件,解压后,拷贝到本地仓库;目录结构根据pom.xml 中的groupId ,ArtifactId 创建;
- deploy:部署,把war包部署到 web服务器,如tomcat,以便运行;
2)maven核心程序,定义了抽象的生命周期,具体由插件来执行; 如下:
3)maven的插件和目标;
| 生命周期阶段 | 插件目标 | 插件 |
| compile | compile | maven-compiler-plugin |
| test-compile | testCompile | maven-compiler-plugin |
补充:插件目标是 调用插件某个功能的命令;
总结自 maven编译日志信息:
[INFO] --- maven-compiler-plugin:3.1:compile (default-compile) @ mavenhello15 ---
[INFO] Nothing to compile - all classes are up to date
[INFO] --- maven-compiler-plugin:3.1:testCompile (default-testCompile) @ mavenhello15 ---
maven插件在mavenhello09项目的 pom中引用, 如下:(在执行maven命令时,若插件不存在,则先下载插件包,然后再执行maven命令)
<pluginManagement><!-- lock down plugins versions to avoid using Maven defaults (may be moved to parent pom) --><plugins><plugin><artifactId>maven-clean-plugin</artifactId><version>3.1.0</version></plugin><!-- see http://maven.apache.org/ref/current/maven-core/default-bindings.html#Plugin_bindings_for_war_packaging --><plugin><artifactId>maven-resources-plugin</artifactId><version>3.0.2</version></plugin><plugin><artifactId>maven-compiler-plugin</artifactId><version>3.8.0</version></plugin><plugin><artifactId>maven-surefire-plugin</artifactId><version>2.22.1</version></plugin><plugin><artifactId>maven-war-plugin</artifactId><version>3.2.2</version></plugin><plugin><artifactId>maven-install-plugin</artifactId><version>2.5.2</version></plugin><plugin><artifactId>maven-deploy-plugin</artifactId><version>2.8.2</version></plugin></plugins></pluginManagement>对比 mavenhello15 项目的pom.xml, 它为什么没有引用插件。 可能是 mavenhello09 中引入了插件,本地mavne已经安装了插件,所以无需引入。(maven插件的引入代码,是idea生成的)
【6】maven配置
1)设置maven jdk(setting.xml)
<profile><id>jdk-1.8</id><activation><activeByDefualt>true</activeByDefualt><jdk>1.8</jdk></activation><properties><project.build.sourceEncoding>UTF-8</project.build.sourceEncoding><maven.compiler.source>1.8</maven.compiler.source><maven.compiler.target>1.8</maven.compiler.target><maven.compiler.compilerVersion>1.8</maven.compiler.compilerVersion></properties>2)创建maven项目,选择maven架构(实际上是下载maven插件,创建不同的maven目录树)

【7】依赖
1)依赖传递性;
- 1.1)因为传递性,依赖不需要在每个工程中都重复声明,只需要在最底层的工程中引入依赖即可; 如 mavenhello09 mavenhello15 都使用spring-core jar , 但 只需要 09 去引入 spring-core依赖即可,无需 15 也去引入;
- 1.2)非compile范围的依赖不能传递,需要单独引用;如 test范围的junit, provideded范围的servlet;
2)依赖排除;
- 2.1)当引入 spring-core 时,会把 commons-logging 一并引入进来; 排除的时候就是,我只引入 spring-core 而不引入 commons-logging;
- 2.2)依赖排除的设置方式:mavenhello15 引入了mavenhello09,mavenhello09引入了spring core, spring core 引入了commons-logging, 因此 根据传递性, mavenhello15引入了 commons-logging; 通过在 hello15项目的pom文件中设置依赖排除 exclusions,可以不引入 commons-logging;
<dependency><groupId>com.cmc.cd</groupId><artifactId>mavenhello09</artifactId><version>1.0-SNAPSHOT</version><scope>compile</scope><exclusions><exclusion><groupId>commons-logging</groupId><artifactId>commons-logging</artifactId></exclusion></exclusions></dependency>
【补充-mavenhello26项目】
为了后续演示方便,我们再创建一个 maven项目 mavenhello26 ;
mavnehello26项目引入了 hello15项目;
目录结构:

pom.xml
<?xml version="1.0" encoding="UTF-8"?>
<project xmlns="http://maven.apache.org/POM/4.0.0"xmlns:xsi="http://www.w3.org/2001/XMLSchema-instance"xsi:schemaLocation="http://maven.apache.org/POM/4.0.0 http://maven.apache.org/xsd/maven-4.0.0.xsd"><modelVersion>4.0.0</modelVersion><groupId>com.cmc.cd</groupId><artifactId>mavenhello26</artifactId><version>1.0-SNAPSHOT</version><properties><maven.compiler.source>8</maven.compiler.source><maven.compiler.target>8</maven.compiler.target><maven.compiler.compilerVersion>1.8</maven.compiler.compilerVersion></properties><dependencies><dependency><groupId>com.cmc.cd</groupId><artifactId>mavenhello15</artifactId><version>1.0-SNAPSHOT</version><scope>compile</scope></dependency><dependency><groupId>junit</groupId><artifactId>junit</artifactId><version>4.11</version><scope>test</scope></dependency></dependencies></project>
主程序+测试程序
package com.cmc.cd;public class MakeFriends {public MakeFriends(){}public String makeFriends(String name){HelloFriend friend = new HelloFriend();String hello = friend.sayHello2Friend(name);return hello + ". i want to make friend with you.";}
}package com.cmc.cd;import org.junit.Assert;
import org.junit.Test;public class MakeFriendsTest {@Testpublic void testMakeFriends(){MakeFriends makeFriend = new MakeFriends();String str = makeFriend.makeFriends("zhaoliu");Assert.assertEquals("hello zhaoliu, i am john. i want to make friend with you.",str);}
}
3)依赖原则说明
3.1)路径最短优先:
3.2)路径相同,则先声明者优先;同pom.xml文件中 dependency标签的先后顺序;

4)统一管理依赖的版本号
问题: 项目引入的spring 框架包的版本是 4.0.0; 如果需要统一升级到 4.1.1 应该怎么办 ?如
spring-core
spring-context
spring-aop
spring-beans
spring-expression
spring-jdbc
spring-tx
spring-orm
spring-web
aopalliance
难道所有依赖全部看一遍? 手动逐一修改不可靠。
解决方案:建议配置方式如下:
4.1)使用 properties 标签内使用自定义标签统一声明版本号;
<properties><spring.version>4.1.1.RELEASE</spring.version></properties>4.2)在需要统一版本的位置,统一使用 ${spring.version} 来引用声明的版本号;
<dependency><groupId>org.springframework</groupId><artifactId>spring-context</artifactId><version>${spring.version}</version></dependency><dependency><groupId>org.springframework</groupId><artifactId>spring-core</artifactId><version>${spring.version}</version></dependency>如果需要修改版本号的话,只需要修改版本号 spring.version 中的值即可;
此外, properties 标签内还可以配置其他变量值,如
<properties><maven.compiler.source>8</maven.compiler.source><maven.compiler.target>8</maven.compiler.target><maven.compiler.compilerVersion>1.8</maven.compiler.compilerVersion><spring.version>4.1.1.RELEASE</spring.version></properties>【8】继承(parent)
1)工程现状:
hello09 依赖的junit:4.10
hello15 依赖的junit:4.11
hello26 依赖的junit:4.11
2)问题: 由于test 范围的依赖不能传递,所以会导致 各个工程的test范围的依赖的版本不一致;
3)需求: 统一管理 各个工程依赖的 junit 版本号;
4)解决方法: 把 junit (或test范围)依赖提取到父工程 parent 中,在工程中不引入junit 依赖,统一继承 父工程;同时也便于修改版本;
- step1)创建一个maven工程,作为父工程,打包方式为pom;
- step2)在子工程中继承或引入父工程;
- step3)把子工程与父工程中的重复引入的依赖删除;
- step4)在父工程中统一引入 junit(或test范围)的依赖;
代码如下:
父工程 mavenhelloparent 的pom文件(注意打包方式为pom);
<?xml version="1.0" encoding="UTF-8"?>
<project xmlns="http://maven.apache.org/POM/4.0.0"xmlns:xsi="http://www.w3.org/2001/XMLSchema-instance"xsi:schemaLocation="http://maven.apache.org/POM/4.0.0 http://maven.apache.org/xsd/maven-4.0.0.xsd"><modelVersion>4.0.0</modelVersion><!-- 父工程中声明打包方式为pom --><groupId>com.cmc.cd</groupId><artifactId>mavenhelloparent</artifactId><version>1.0-SNAPSHOT</version><packaging>pom</packaging><properties><maven.compiler.source>8</maven.compiler.source><maven.compiler.target>8</maven.compiler.target></properties><!-- 统一配置依赖的管理 --><dependencyManagement><dependencies><dependency> <groupId>junit</groupId><artifactId>junit</artifactId><version>4.11</version><scope>test</scope></dependency></dependencies></dependencyManagement>
</project>- 在hello26项目中 声明对 parent 引入;
- 删除 junit 依赖;
- 删除 groupId, version,只保留 hello26的artifactId,因为 groupId,version从parent 继承下来;
<!-- 子工程中声明对父工程的引用 --><parent><groupId>com.cmc.cd</groupId><artifactId>mavenhelloparent</artifactId><version>1.0-SNAPSHOT</version><!-- relativePath-指定父工程pom.xml文件的相对路径 --><relativePath>../mavenhelloparent/pom.xml</relativePath></parent>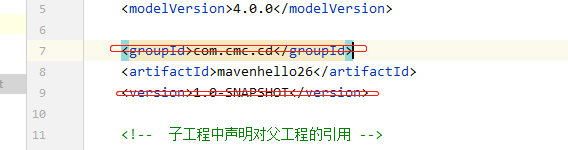
hello26项目 执行 mvn package, 报 junit 不存在;

原因: helloparent项目没有安装到本地库, 在 helloparent项目中执行 mvn install 即可;
-- mvn install 命令执行日志
[INFO] --- maven-install-plugin:2.4:install (default-install) @ mavenhelloparent ---
[INFO] Installing D:\workbench_idea\maven\mavenhelloparent\pom.xml to D:\software_cluster\mvn_repo\com\cmc\cd\mavenhelloparent\1.0-SNAPSHOT\mavenhelloparent-1.0-SNAPSHOT.pom 
再次在 hello26项目中执行 mvn package,成功;
小结:
以上步骤定义了父工程 mavenhelloparent;
定义了子工程 hello26,继承了 parent工程;
其中 子工程hello26 还删除了pom文件中重复代码groupId和version,移除了多余的依赖 junit;
【9】聚合
1)安装 工程,一个一个安装,特别麻烦
hello26 继承自 helloparent, hello26引入 hello15依赖,hello15引入hello09 依赖;如果要安装hello26(安装的意思是打包到maven本地库),必须首先安装 helloparent,hello09, hello15 ,然后最后可以成功安装 hello26; 这样一个一个安装非常麻烦,特别项目或框架jar包比较多的情况下;
2)聚合作用: 一键安装 hello26工程依赖的模块或制品库;
在聚合工程(本文把 mavenparent当做聚合工程,在parent工程的pom文件添加如下聚合配置)
<!-- 配置聚合 --><modules><!-- 指定各个子工程的相对路径 --><module>../mavenhello09</module><module>../mavenhello15</module><module>../mavenhello26</module></modules>3)如何使用, 在聚合工程(也叫父类工程)执行mvn install 把它安装到 maven 本地库;
【聚合例子】
mavenparent工程的pom.xml 文件如下:
<?xml version="1.0" encoding="UTF-8"?>
<project xmlns="http://maven.apache.org/POM/4.0.0"xmlns:xsi="http://www.w3.org/2001/XMLSchema-instance"xsi:schemaLocation="http://maven.apache.org/POM/4.0.0 http://maven.apache.org/xsd/maven-4.0.0.xsd"><modelVersion>4.0.0</modelVersion><!-- 父工程中声明打包方式为pom --><groupId>com.cmc.cd</groupId><artifactId>mavenhelloparent</artifactId><version>1.0-SNAPSHOT</version><!-- 配置聚合 --><modules><!-- 指定各个子工程的相对路径 --><module>../mavenhello09</module><module>../mavenhello15</module><module>../mavenhello26</module></modules><dependencies><dependency><groupId>junit</groupId><artifactId>junit</artifactId><version>4.12</version><scope>test</scope></dependency></dependencies><packaging>pom</packaging><properties><maven.compiler.source>8</maven.compiler.source><maven.compiler.target>8</maven.compiler.target></properties><!-- 统一配置依赖的管理 --><dependencyManagement><dependencies><dependency><groupId>junit</groupId><artifactId>junit</artifactId><version>4.12</version><scope>test</scope></dependency></dependencies></dependencyManagement>
</project>
先删除本地maven库的依赖文件(为了测试用);
再执行 mvn install ,安装pom文件配置的所有依赖模块module,包括 mavenhello09, mavenhello15, mavenhello26, mavenparent(本身)共计3个模块;
安装日志如下:
[INFO] Scanning for projects...
[INFO] ------------------------------------------------------------------------
[INFO] Reactor Build Order:
[INFO]
[INFO] mavenhello09 Maven Webapp
[INFO] mavenhello15
[INFO] mavenhelloparent
[INFO] mavenhello26
[INFO]
[INFO] ------------------------------------------------------------------------
[INFO] Building mavenhello09 Maven Webapp 1.0-SNAPSHOT
[INFO] ------------------------------------------------------------------------
[INFO]
[INFO] --- maven-resources-plugin:3.0.2:resources (default-resources) @ mavenhello09 ---
[INFO] Using 'UTF-8' encoding to copy filtered resources.
[INFO] Copying 0 resource
[INFO]
[INFO] --- maven-compiler-plugin:3.8.0:compile (default-compile) @ mavenhello09 ---
[INFO] Nothing to compile - all classes are up to date
[INFO]
[INFO] --- maven-resources-plugin:3.0.2:testResources (default-testResources) @ mavenhello09 ---
[INFO] Using 'UTF-8' encoding to copy filtered resources.
[INFO] Copying 0 resource
[INFO]
[INFO] --- maven-compiler-plugin:3.8.0:testCompile (default-testCompile) @ mavenhello09 ---
[INFO] Nothing to compile - all classes are up to date
[INFO]
[INFO] --- maven-surefire-plugin:2.22.1:test (default-test) @ mavenhello09 ---
[INFO]
[INFO] -------------------------------------------------------
[INFO]  T E S T S
[INFO] -------------------------------------------------------
[INFO] Running com.cmc.cd.HelloTest
[INFO] Tests run: 1, Failures: 0, Errors: 0, Skipped: 0, Time elapsed: 0.033 s - in com.cmc.cd.HelloTest
[INFO]
[INFO] Results:
[INFO]
[INFO] Tests run: 1, Failures: 0, Errors: 0, Skipped: 0
[INFO]
[INFO]
[INFO] --- maven-jar-plugin:2.4:jar (default-jar) @ mavenhello09 ---
[INFO] Building jar: D:\workbench_idea\maven\mavenhello09\target\mavenhello09.jar
[INFO]
[INFO] --- maven-install-plugin:2.5.2:install (default-install) @ mavenhello09 ---
[INFO] Installing D:\workbench_idea\maven\mavenhello09\target\mavenhello09.jar to D:\software_cluster\mvn_repo\com\cmc\cd\mavenhello09\1.0-SNAPSHOT\mavenhello09-1.0-SNAPSHOT.jar
[INFO] Installing D:\workbench_idea\maven\mavenhello09\pom.xml to D:\software_cluster\mvn_repo\com\cmc\cd\mavenhello09\1.0-SNAPSHOT\mavenhello09-1.0-SNAPSHOT.pom
[INFO]
[INFO] ------------------------------------------------------------------------
[INFO] Building mavenhello15 1.0-SNAPSHOT
[INFO] ------------------------------------------------------------------------
[INFO]
[INFO] --- maven-resources-plugin:2.6:resources (default-resources) @ mavenhello15 ---
[INFO] Using 'UTF-8' encoding to copy filtered resources.
[INFO] Copying 0 resource
[INFO] 阿里云Maven中央仓库为阿里云云效提供的公共代理仓库,云效也提供了免费、可靠的Maven私有仓库Packages,欢迎您体验使用。https://www.aliyun.com/product/yunxiao/packages?channel=pd_maven_download
[INFO]
[INFO] --- maven-compiler-plugin:3.1:compile (default-compile) @ mavenhello15 ---
[INFO] Nothing to compile - all classes are up to date
[INFO]
[INFO] --- maven-resources-plugin:2.6:testResources (default-testResources) @ mavenhello15 ---
[INFO] Using 'UTF-8' encoding to copy filtered resources.
[INFO] Copying 0 resource
[INFO] 阿里云Maven中央仓库为阿里云云效提供的公共代理仓库,云效也提供了免费、可靠的Maven私有仓库Packages,欢迎您体验使用。https://www.aliyun.com/product/yunxiao/packages?channel=pd_maven_download
[INFO]
[INFO] --- maven-compiler-plugin:3.1:testCompile (default-testCompile) @ mavenhello15 ---
[INFO] Nothing to compile - all classes are up to date
[INFO]
[INFO] --- maven-surefire-plugin:2.12.4:test (default-test) @ mavenhello15 ---
[INFO] Surefire report directory: D:\workbench_idea\maven\mavenhello15\target\surefire-reports-------------------------------------------------------T E S T S
-------------------------------------------------------
Running com.cmc.cd.HelloFriendTest
hello wangwu, i am john
Tests run: 1, Failures: 0, Errors: 0, Skipped: 0, Time elapsed: 0.07 secResults :Tests run: 1, Failures: 0, Errors: 0, Skipped: 0[INFO]
[INFO] --- maven-jar-plugin:2.4:jar (default-jar) @ mavenhello15 ---
[INFO] Building jar: D:\workbench_idea\maven\mavenhello15\target\mavenhello15-1.0-SNAPSHOT.jar
[INFO]
[INFO] --- maven-install-plugin:2.4:install (default-install) @ mavenhello15 ---
[INFO] Installing D:\workbench_idea\maven\mavenhello15\target\mavenhello15-1.0-SNAPSHOT.jar to D:\software_cluster\mvn_repo\com\cmc\cd\mavenhello15\1.0-SNAPSHOT\mavenhello15-1.0-SNAPSHOT.jar
[INFO] Installing D:\workbench_idea\maven\mavenhello15\pom.xml to D:\software_cluster\mvn_repo\com\cmc\cd\mavenhello15\1.0-SNAPSHOT\mavenhello15-1.0-SNAPSHOT.pom
[INFO]
[INFO] ------------------------------------------------------------------------
[INFO] Building mavenhelloparent 1.0-SNAPSHOT
[INFO] ------------------------------------------------------------------------
[INFO]
[INFO] --- maven-install-plugin:2.4:install (default-install) @ mavenhelloparent ---
[INFO] Installing D:\workbench_idea\maven\mavenhelloparent\pom.xml to D:\software_cluster\mvn_repo\com\cmc\cd\mavenhelloparent\1.0-SNAPSHOT\mavenhelloparent-1.0-SNAPSHOT.pom
[INFO]
[INFO] ------------------------------------------------------------------------
[INFO] Building mavenhello26 1.0-SNAPSHOT
[INFO] ------------------------------------------------------------------------
[INFO]
[INFO] --- maven-resources-plugin:2.6:resources (default-resources) @ mavenhello26 ---
[INFO] Using 'UTF-8' encoding to copy filtered resources.
[INFO] Copying 0 resource
[INFO] 阿里云Maven中央仓库为阿里云云效提供的公共代理仓库,云效也提供了免费、可靠的Maven私有仓库Packages,欢迎您体验使用。https://www.aliyun.com/product/yunxiao/packages?channel=pd_maven_download
[INFO]
[INFO] --- maven-compiler-plugin:3.1:compile (default-compile) @ mavenhello26 ---
[INFO] Nothing to compile - all classes are up to date
[INFO]
[INFO] --- maven-resources-plugin:2.6:testResources (default-testResources) @ mavenhello26 ---
[INFO] Using 'UTF-8' encoding to copy filtered resources.
[INFO] Copying 0 resource
[INFO] 阿里云Maven中央仓库为阿里云云效提供的公共代理仓库,云效也提供了免费、可靠的Maven私有仓库Packages,欢迎您体验使用。https://www.aliyun.com/product/yunxiao/packages?channel=pd_maven_download
[INFO]
[INFO] --- maven-compiler-plugin:3.1:testCompile (default-testCompile) @ mavenhello26 ---
[INFO] Nothing to compile - all classes are up to date
[INFO]
[INFO] --- maven-surefire-plugin:2.12.4:test (default-test) @ mavenhello26 ---
[INFO] Surefire report directory: D:\workbench_idea\maven\mavenhello26\target\surefire-reports-------------------------------------------------------T E S T S
-------------------------------------------------------
Running com.cmc.cd.MakeFriendsTest
Tests run: 1, Failures: 0, Errors: 0, Skipped: 0, Time elapsed: 0.097 secResults :Tests run: 1, Failures: 0, Errors: 0, Skipped: 0[INFO]
[INFO] --- maven-jar-plugin:2.4:jar (default-jar) @ mavenhello26 ---
[INFO]
[INFO] --- maven-install-plugin:2.4:install (default-install) @ mavenhello26 ---
[INFO] Installing D:\workbench_idea\maven\mavenhello26\target\mavenhello26-1.0-SNAPSHOT.jar to D:\software_cluster\mvn_repo\com\cmc\cd\mavenhello26\1.0-SNAPSHOT\mavenhello26-1.0-SNAPSHOT.jar
[INFO] Installing D:\workbench_idea\maven\mavenhello26\pom.xml to D:\software_cluster\mvn_repo\com\cmc\cd\mavenhello26\1.0-SNAPSHOT\mavenhello26-1.0-SNAPSHOT.pom
[INFO] ------------------------------------------------------------------------
[INFO] Reactor Summary:
[INFO]
[INFO] mavenhello09 Maven Webapp .......................... SUCCESS [  6.173 s]
[INFO] mavenhello15 ....................................... SUCCESS [  1.942 s]
[INFO] mavenhelloparent ................................... SUCCESS [  0.013 s]
[INFO] mavenhello26 ....................................... SUCCESS [  1.058 s]
[INFO] ------------------------------------------------------------------------
[INFO] BUILD SUCCESS
[INFO] ------------------------------------------------------------------------
[INFO] Total time: 9.339 s
[INFO] Finished at: 2021-07-25T10:10:40+08:00
[INFO] Final Memory: 14M/217M
[INFO] ------------------------------------------------------------------------Process finished with exit code 0
【10】maven自动部署web工程
1)mvn deploy: 把web项目打包成war包后,拷贝到 服务器如tomcat的webapp目录下;
(仅供参考,因为要手动执行mvn命令,一般情况下IDE都提供了便捷的操作api,IDE部署比较方便)
2)pom配置如下(特别 build标签下的配置)
<?xml version="1.0" encoding="UTF-8"?><project xmlns="http://maven.apache.org/POM/4.0.0" xmlns:xsi="http://www.w3.org/2001/XMLSchema-instance"xsi:schemaLocation="http://maven.apache.org/POM/4.0.0 http://maven.apache.org/xsd/maven-4.0.0.xsd"><modelVersion>4.0.0</modelVersion><groupId>com.cmb.cmc</groupId><artifactId>mavenweb34</artifactId><version>1.0-SNAPSHOT</version><packaging>war</packaging><name>mavenweb34</name><properties><project.build.sourceEncoding>UTF-8</project.build.sourceEncoding><maven.compiler.source>1.8</maven.compiler.source><maven.compiler.target>1.8</maven.compiler.target></properties><dependencies><dependency><groupId>junit</groupId><artifactId>junit</artifactId><version>4.11</version><scope>test</scope></dependency><dependency><groupId>javax.servlet</groupId><artifactId>javax.servlet-api</artifactId><version>3.1.0</version><scope>provided</scope></dependency><!-- servlet依赖的jar包start --><!-- jsp依赖jar包start --><dependency><groupId>javax.servlet.jsp</groupId><artifactId>javax.servlet.jsp-api</artifactId><version>2.3.1</version><scope>provided</scope></dependency></dependencies><!-- 配置当前工程构建过程中的配置 --><build><finalName>mavenweb34</finalName><pluginManagement><!-- lock down plugins versions to avoid using Maven defaults (may be moved to parent pom) --><!-- 构建过程中需要使用的插件 --><plugins><plugin><!-- cargo是一家启动servlet容器的组织 --><groupId>com.codehaus.cargo</groupId><artifactId>cargo-maven2-plugin</artifactId><version>1.2.3</version><!-- 插件配置 --><configuration><!-- 配置容器tomcat路径 --><container><containerId>tomcat7x</containerId><home>D:\software_cluster\dev_tools\tomcat\apache-tomcat-7.0.106-windows-x64\apache-tomcat-7.0.106</home></container><configuration><type>existing</type><home>D:\software_cluster\dev_tools\tomcat\apache-tomcat-7.0.106-windows-x64\apache-tomcat-7.0.106</home><!--  配置端口号,若默认为8080,则无需以下配置 --><!--<properties><cargo.servlet.port>8989</cargo.servlet.port></properties>--></configuration></configuration><!-- 配置插件在什么情况下执行  --><executions><execution><id>cargo-run</id><!--生命周期阶段 --><phase>install</phase><goals><!-- 插件目标 --><goal>run</goal></goals></execution></executions></plugin></plugins></pluginManagement></build>
</project>


)


部署 Spring Boot 到远程 Docker 容器)
)