【README】
本文po出了自建springboot 启动器步骤;
【1】新建2个starter相关组件
根据 mybatis-spring-boot-starter,我们看到 自建starter需要两个组件,分别是 xxx-spring-boot-starter, xxx-spring-boot-starter-autoconfigure ;
其中,xxx-spring-boot-starter负责引入 xxx-spring-boot-starter-autoconfigure 依赖; xxx-spring-boot-starter-autoconfigure 负责定义相关配置;
step1,新建空项目 ;
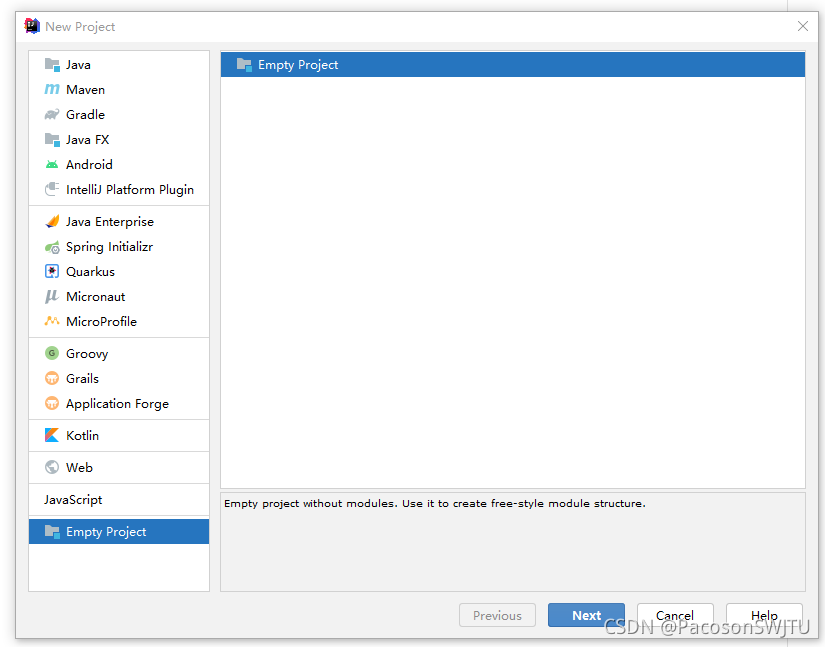
项目名称为: springbt-08-starter-diy2;
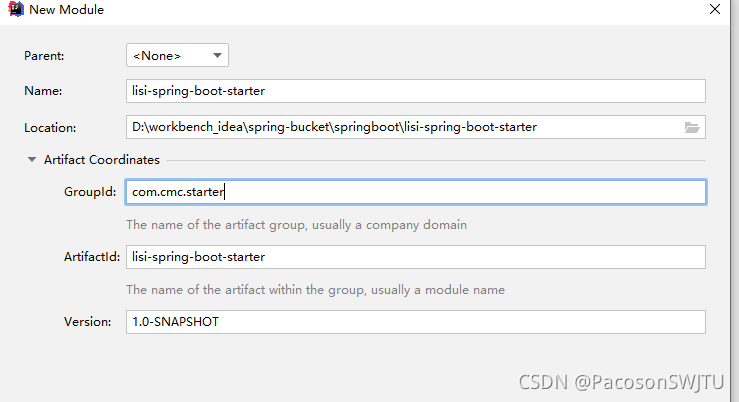
step2,在空项目上新建2个组件,分别为
lisi-spring-boot-starter 和 lisi-spring-boot-starter-autoconfigure;
其中, lisi-spring-boot-starter为 单纯的maven项目;
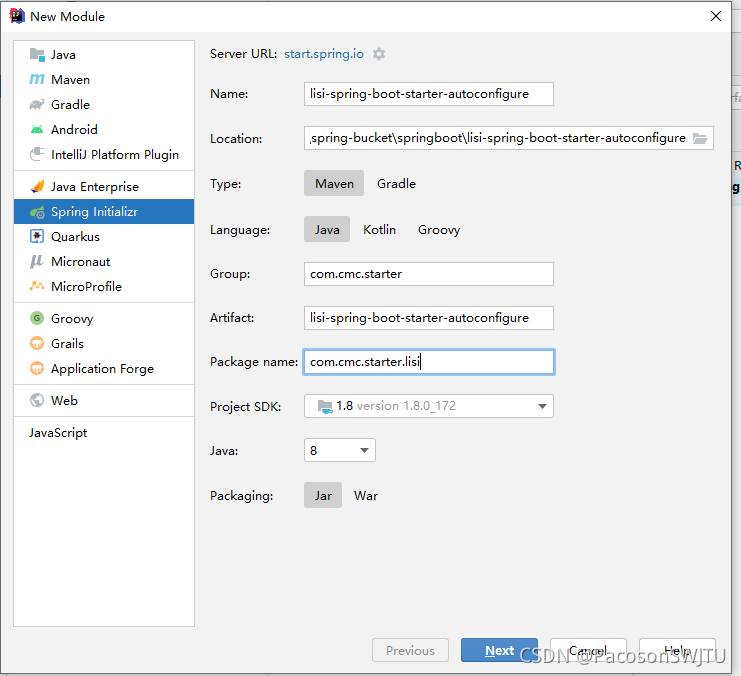
lisi-spring-boot-starter-autoconfigure 通过 spring Initializer 工具创建;
step3, lisi-spring-boot-starter 引入 lisi-spring-boot-starter-autoconfigure 依赖;
lisi-spring-boot-starter组件的pom.xml 如下:
<?xml version="1.0" encoding="UTF-8"?>
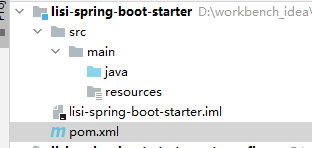
<project xmlns="http://maven.apache.org/POM/4.0.0"xmlns:xsi="http://www.w3.org/2001/XMLSchema-instance"xsi:schemaLocation="http://maven.apache.org/POM/4.0.0 http://maven.apache.org/xsd/maven-4.0.0.xsd"><modelVersion>4.0.0</modelVersion><groupId>com.cmc.starter</groupId><artifactId>lisi-spring-boot-starter</artifactId><version>1.0-SNAPSHOT</version><dependencies><!--引入 lisi-spring-boot-starter-autoconfigure 依赖--><dependency><groupId>com.cmc.starter</groupId><artifactId>lisi-spring-boot-starter-autoconfigure</artifactId><version>0.0.1-SNAPSHOT</version></dependency></dependencies></project>并把测试目标目录删除, lisi-spring-boot-starter目录结构如下:
step4, lisi-spring-boot-starter-autoconfigure 组件的pom.xml 如下:
(删除多余的插件, 测试库依赖)
<?xml version="1.0" encoding="UTF-8"?>
<project xmlns="http://maven.apache.org/POM/4.0.0" xmlns:xsi="http://www.w3.org/2001/XMLSchema-instance"xsi:schemaLocation="http://maven.apache.org/POM/4.0.0 https://maven.apache.org/xsd/maven-4.0.0.xsd"><modelVersion>4.0.0</modelVersion><parent><groupId>org.springframework.boot</groupId><artifactId>spring-boot-starter-parent</artifactId><version>2.5.5</version><relativePath/> <!-- lookup parent from repository --></parent><groupId>com.cmc.starter</groupId><artifactId>lisi-spring-boot-starter-autoconfigure</artifactId><version>0.0.1-SNAPSHOT</version><name>lisi-spring-boot-starter-autoconfigure</name><description>Demo project for Spring Boot</description><properties><java.version>1.8</java.version></properties><dependencies><dependency><groupId>org.springframework.boot</groupId><artifactId>spring-boot-starter</artifactId></dependency></dependencies></project>
【2】开发 starter-autoconfigure 启动器配置组件
step1, 新建 HelloService,HelloProperties, HelloServiceAutoConfiguration ;
package com.cmc.starter.lisi;import org.springframework.boot.context.properties.ConfigurationProperties;@ConfigurationProperties(prefix = "cmc.hello")
public class HelloProperties {private String prefix;private String suffix;public String getPrefix() {return prefix;}public void setPrefix(String prefix) {this.prefix = prefix;}public String getSuffix() {return suffix;}public void setSuffix(String suffix) {this.suffix = suffix;}
}
package com.cmc.starter.lisi;public class HelloService {HelloProperties helloProperties;public String sayHelloCmc(String name) {return helloProperties.getPrefix() + "-" + name + "-" + helloProperties.getSuffix();}public HelloProperties getHelloProperties() {return helloProperties;}public void setHelloProperties(HelloProperties helloProperties) {this.helloProperties = helloProperties;}
}
package com.cmc.starter.lisi;import org.springframework.beans.factory.annotation.Autowired;
import org.springframework.boot.autoconfigure.condition.ConditionalOnWebApplication;
import org.springframework.boot.context.properties.EnableConfigurationProperties;
import org.springframework.context.annotation.Bean;
import org.springframework.context.annotation.Configuration;@Configuration
@ConditionalOnWebApplication // web应用才生效
@EnableConfigurationProperties(HelloProperties.class) // 使属性文件生效
public class HelloServiceAutoConfiguration {@AutowiredHelloProperties helloProperties;@Beanpublic HelloService helloService() {HelloService helloService = new HelloService();helloService.setHelloProperties(helloProperties);return helloService;}
}
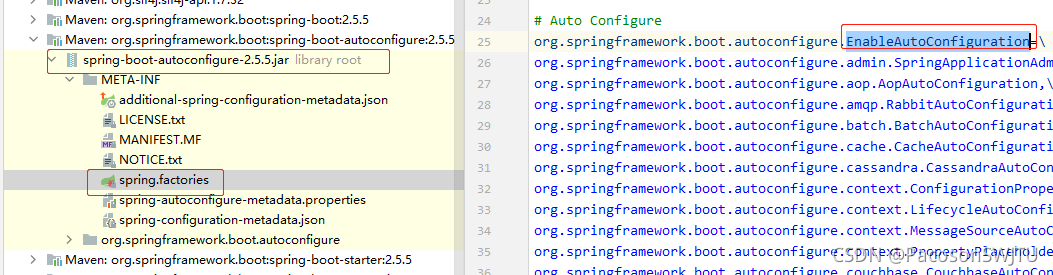
step2,在资源类路径下新建 META-INF/spring.factories 属性文件;添加 自动配置类全限定类名;
# spring.factories# Auto Config
org.springframework.boot.autoconfigure.EnableAutoConfiguration=\
com.cmc.starter.lisi.HelloServiceAutoConfiguration
参考的是 spring-boot-autoconfigure.jar 中的 META-INF/spring.factories的内容;
目录结构如下:

step3,先把 lisi-spring-boot-starter-autoconfigure 制品库安装到本地仓库
step4,再把 lisi-spring-boot-starter 制品库安装到本地仓库;
【3】自建starter使用
step1, 新建项目,只需要引入 lisi-spring-boot-starter依赖 即可, 因为 lisi-spring-boot-starter 引入了 lisi-spring-boot-starter-autoconfigure,传递依赖;
pom.xml 如下:
<?xml version="1.0" encoding="UTF-8"?>
<project xmlns="http://maven.apache.org/POM/4.0.0" xmlns:xsi="http://www.w3.org/2001/XMLSchema-instance"xsi:schemaLocation="http://maven.apache.org/POM/4.0.0 https://maven.apache.org/xsd/maven-4.0.0.xsd"><modelVersion>4.0.0</modelVersion><parent><groupId>org.springframework.boot</groupId><artifactId>spring-boot-starter-parent</artifactId><version>2.5.5</version><relativePath/> <!-- lookup parent from repository --></parent><groupId>com.cmc</groupId><artifactId>springboot-08-starter-test2</artifactId><version>0.0.1-SNAPSHOT</version><name>springboot-08-starter-test2</name><description>Demo project for Spring Boot</description><properties><java.version>1.8</java.version></properties><dependencies><!--引入自定义的starter--><dependency><groupId>com.cmc.starter</groupId><artifactId>lisi-spring-boot-starter</artifactId><version>1.0-SNAPSHOT</version></dependency><!-- 测试库 --><dependency><groupId>org.springframework.boot</groupId><artifactId>spring-boot-starter-test</artifactId><scope>test</scope></dependency><!-- springboot web库 --><dependency><groupId>org.springframework.boot</groupId><artifactId>spring-boot-starter-web</artifactId></dependency></dependencies><build><plugins><plugin><groupId>org.springframework.boot</groupId><artifactId>spring-boot-maven-plugin</artifactId></plugin></plugins></build></project>
step2, 新建测试项目;编写 Controller,引入 HelloService
import com.cmc.starter.lisi.HelloService;
import org.springframework.beans.factory.annotation.Autowired;
import org.springframework.web.bind.annotation.GetMapping;
import org.springframework.web.bind.annotation.RestController;@RestController
public class HelloController {@AutowiredHelloService helloService;@GetMapping("/hello")public String hello() {return helloService.sayHelloCmc("zhangsan");}
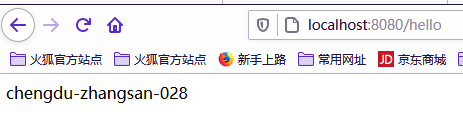
}step3,HelloServiceAutoConfiguration有两个属性前缀后缀,需要配置;在 application.properties 中配置如下:
cmc.hello.prefix=chengdu
cmc.hello.suffix=028
step4,启动springboot项目,并访问
localhost:8080/hello ;
——Jstack)


![[中级]Java命令学习系列(五)——jhat](http://pic.xiahunao.cn/[中级]Java命令学习系列(五)——jhat)


![[初级]Java命令学习系列(六)——jinfo](http://pic.xiahunao.cn/[初级]Java命令学习系列(六)——jinfo)

)
![[初级]Java命令学习系列(七)——javap](http://pic.xiahunao.cn/[初级]Java命令学习系列(七)——javap)


 高阶微分方程)


