引言
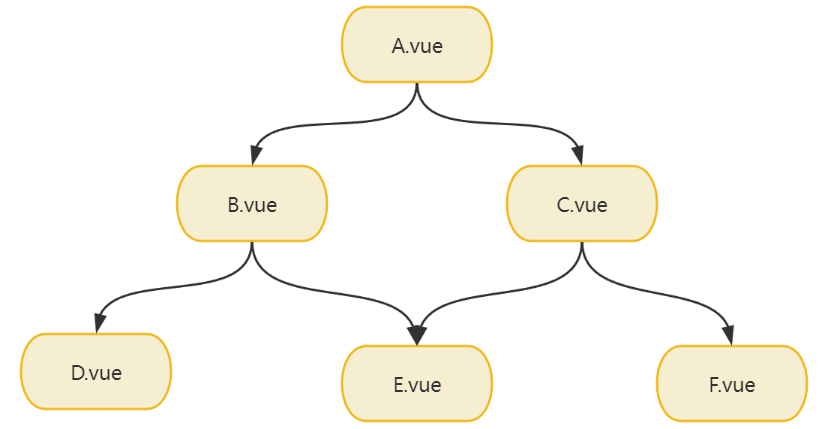
组件间的关系有父子关系、兄弟关系、祖孙关系和远亲关系。
不同的关系间,组件的通信有不同的方式。

一、prop 和 $emit
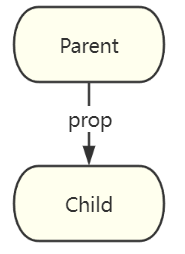
prop向下传递,emit向上传递。
父组件使用 prop 向子组件传递信息。
ParentComponent.vue
<template><div><ChildComponent msg="Hello,this is the message passed from the parent component."></ChildComponent><ChildComponent :msg="parentMsg"></ChildComponent></div>
</template>
<script>
import ChildComponent from './ChildComponent.vue';export default {data() {return {parentMsg: 'Hello,this is the message passed from the parent component.'}},components: {ChildComponent}
}
</script>
ChildComponent.vue
<template><div><p>{{ msg }}</p></div>
</template>
<script>
export default {props: {msg: String}
}
</script>
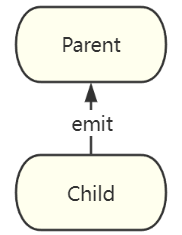
子组件通过实例的事件方法 $emit 向父组件通信
$emit 触发一个自定义事件,并接受一个参数作为抛出值。父组件通过 $event 或回调函数获取传递值。
ParentComponent.vue
<template><div><p>{{ msg }}</p><!-- <ChildComponent @custom-event="handleCustomEvent"></ChildComponent> --><!-- 或者 --><ChildComponent @custom-event="msg=$event"></ChildComponent></div>
</template>
<script>
import ChildComponent from './ChildComponent.vue';export default {data() {return {msg: '现在为空'}},components: {ChildComponent},methods: {handleCustomEvent(msg) {this.msg = msg;}},
}
</script>
ChildComponent.vue
<template><div><button @click="sendMsgToParent">发送消息到父组件</button></div>
</template>
<script>
export default {data() {return {msg: 'Hello,this is the message passed from child component.'}},methods: {sendMsgToParent() {this.$emit('custom-event', this.msg);}}
}
</script>
优先使用 prop 和 事件进行父子组件间的通信。
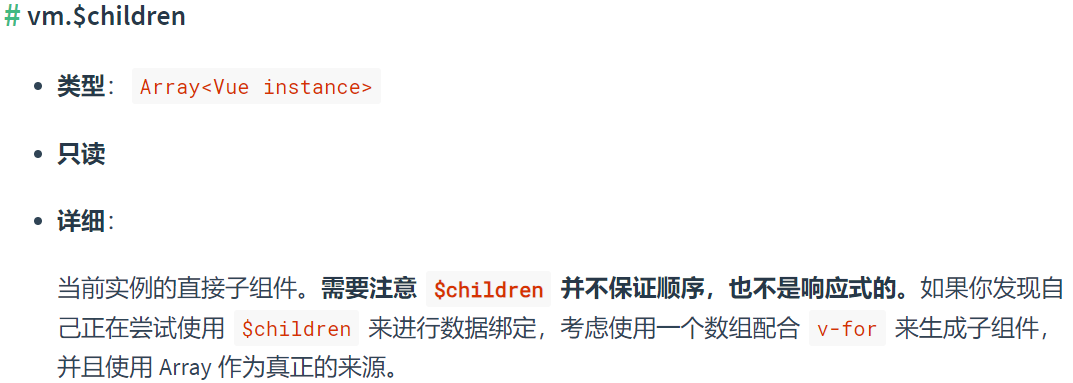
二、$parent 和 $children
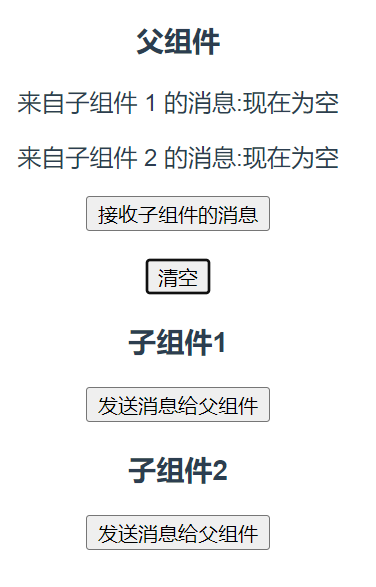
子实例可以用 this.$parent 访问父实例,同时子实例被推入父实例的 $children 数组中。
ParentComponent.vue
<template><div><h3>父组件</h3><p>来自子组件 1 的消息:{{ msg1 }}</p><p>来自子组件 2 的消息:{{ msg2 }}</p><button @click="receiveMsgFromChildren">接收子组件的消息</button><br><br><button @click="msg1= '现在为空';msg2='现在为空'">清空</button><ChildComponent1 /><ChildComponent2 /></div>
</template>
<script>
import ChildComponent1 from './ChildComponent1.vue';
import ChildComponent2 from './ChildComponent2.vue'export default {data() {return {msg1: '现在为空',msg2: '现在为空'}},components: {ChildComponent1,ChildComponent2},methods: {receiveMsgFromChildren() {this.msg1 = this.$children[0].msg;this.msg2 = this.$children[1].msg;}},
}
</script>
ChildComponent1.vue
<template><div><h3>子组件1</h3><button @click="sendMsgToParent">发送消息给父组件</button></div>
</template>
<script>
export default {data() {return {msg: 'Hello,this is the message passed from child component1.'}},methods: {sendMsgToParent() {this.$parent.msg1 = this.msg;}}
}
</script>
ChildComponent2.vue
<template><div><h3>子组件2</h3><button @click="sendMsgToParent">发送消息给父组件</button></div>
</template>
<script>
export default {data() {return {msg: 'Hello,this is the message passed from child component2.'}},methods: {sendMsgToParent() {this.$parent.msg2 = this.msg;}}
}
</script>
三、依赖注入
依赖注入设置两个选项:provide 和 inject
provide 选项允许我们提供一系列数据或方法。然后在设置了 provide 选项的组件的所有后代组件里都可以通过 inject 选项获取这些数据或方法。
provide 选项应该是一个对象或返回一个对象的函数。
provide: {foo: 'bar'
}provide: {return {foo: 'bar'}
}
inject 选项可以为以下值:
- 一个字符串数组,其元素值为
provide属性的 key。 - 一个对象,对象的 key 是绑定在本地的,可以与
provide不同,如果要设置为不同名的属性,那么就要给该属性设置from属性来说明它来自哪个provide提供的属性,同时你可以为它提供默认值default。
inject: ['foo']inject: {foo: {from: 'bar'default: 'foo'}
}
四、ref 和 $refs
ref 属性为普通 DOM 元素或子组件指定引用,该引用会被注册到父组件的 $refs 对象上。
<div ref="div"></div><child-component ref="child" />
使用
vm.$refs.divvm.$refs.child
如果你尝试在 created 或 mounted 钩子中访问 ref,通常会得到 undefined。因为 ref 本身是作为渲染结果被创建的,在初始渲染(beforeUpdate之前)的时候你不能访问它们。
五、事件总线
使用事件总线进行组件间通信的步骤:
1.创建事件总线
// EventBus.js
import Vue from 'vue';
export const EventBus = new Vue();
2.引入事件总线
import { EventBus } from './EventBus.js';
3.在发送组件中触发事件
EventBus.$emit('custom-event',eventData);
4.在接收组件中监听事件
EventBus.$on('custom-event',(data)=>{//处理 data
});
5.移除监听事件
EventBus.$off('custom-event')
六、$attrs 与 $listeners
$attrs包含了父组件传递给子组件的所有没有在子组件 props 中声明的属性(除了class和style)。当子组件没有声明任何props时,$attrs中会包含所有父组件传递的属性(除了class和style),这在创建高级别的通用组件时非常有用,因为你无需知道父组件会传递哪些属性。
下面是一个示例来说明$attrs的用法:
假设我们有一个名为MyButton的子组件,它可以接收label属性,但同时也希望允许父组件传递任意额外的HTML属性给按钮元素。我们可以使用$attrs来实现这一点:
<template><button v-bind="$attrs">{{ label }}</button>
</template><script>
export default {props: {label: String,},
};
</script>
在这个示例中,MyButton组件只声明了一个名为label的prop,但它使用v-bind="$attrs"将所有父组件传递的属性绑定到按钮元素上。这意味着,父组件可以像这样使用MyButton:
<MyButton label="Click me" class="btn btn-primary" id="my-button" @click.native="handleClick" />
在这里,class和id属性会被传递到<button>元素,而label会被解析为"Click me",同时@click事件也会正常工作。

$listeners 包含了父作用域中的 (不含 .native 修饰器的) v-on 事件监听器。它可以通过 v-on="$listeners" 传入内部组件——在创建更高层次的组件时非常有用。
ParentComponent.vue
<template><div><MyButton label="Click me" class="btn btn-primary" id="my-button" @click="handleClick" /></div>
</template><script>
import MyButton from './MyButton.vue'export default {components: {MyButton},methods: {handleClick() {console.log('点击了1次')}}
};
</script>
MyButton.vue
<template><button v-bind="$attrs" v-on="$listeners">{{ label }}</button>
</template><script>
export default {props: {label: String,},
};
</script>
七、Vuex
以后专门学习,在此不做介绍先。
八、浏览器客户端存储
MDN-客户端存储


![[2023.09.12]: Yew应用开发的第一个hook--use_state](http://pic.xiahunao.cn/[2023.09.12]: Yew应用开发的第一个hook--use_state)

)


