原文链接:同步服务器操作系统公网仓库到本地02 —搭建http内网仓库源| 麒麟KOS | 统信UOS | 中科方德 NFSCNS
Hello,大家好啊!继之前我们讨论了如何同步服务器公网仓库到本地服务器之后,今天我们将进入这个系列的第二篇文章——通过配置nginx服务,将本地源共享给其他服务器使用。这一步是建立本地镜像站点的关键环节,可以帮助我们在局域网内高效地分发软件包,大大提升更新和部署的速度,同时也节省了宽带资源。本篇文章使用麒麟KOS服务器示例,统信UOS服务器及中科方德NFSCNS服务器同样也适用。下面,让我们开始详细的配置过程。
安装和配置Nginx
Nginx是一个高性能的HTTP和反向代理服务器,也是一个非常流行的邮件代理服务器。它以其高效、稳定而闻名。我们将利用Nginx来搭建本地源服务器。
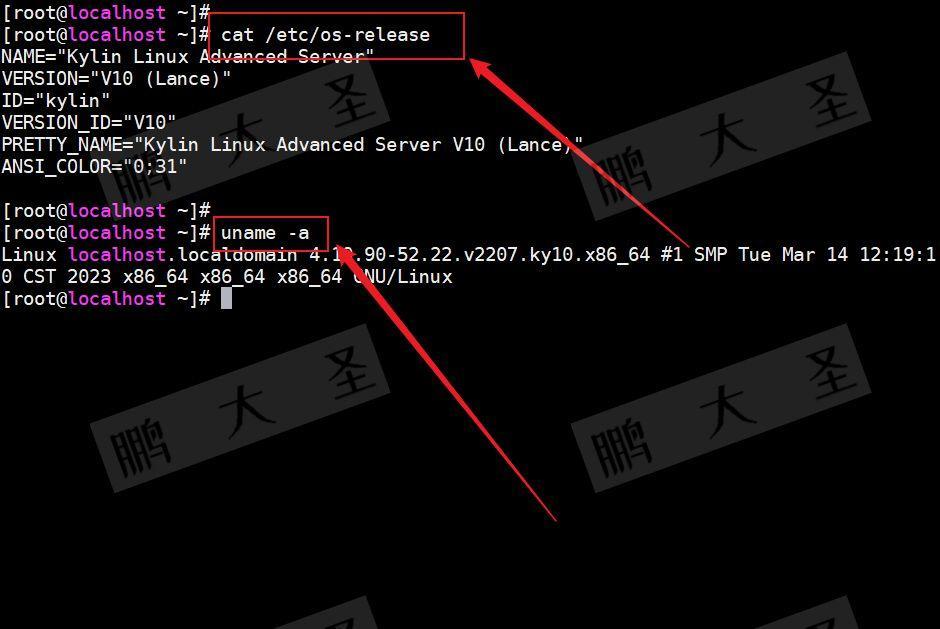
1.查看系统信息
[root@localhost ~]# cat /etc/os-release
[root@localhost ~]# uname -a
2.安装nginx
[root@localhost ~]# yum install nginx -y

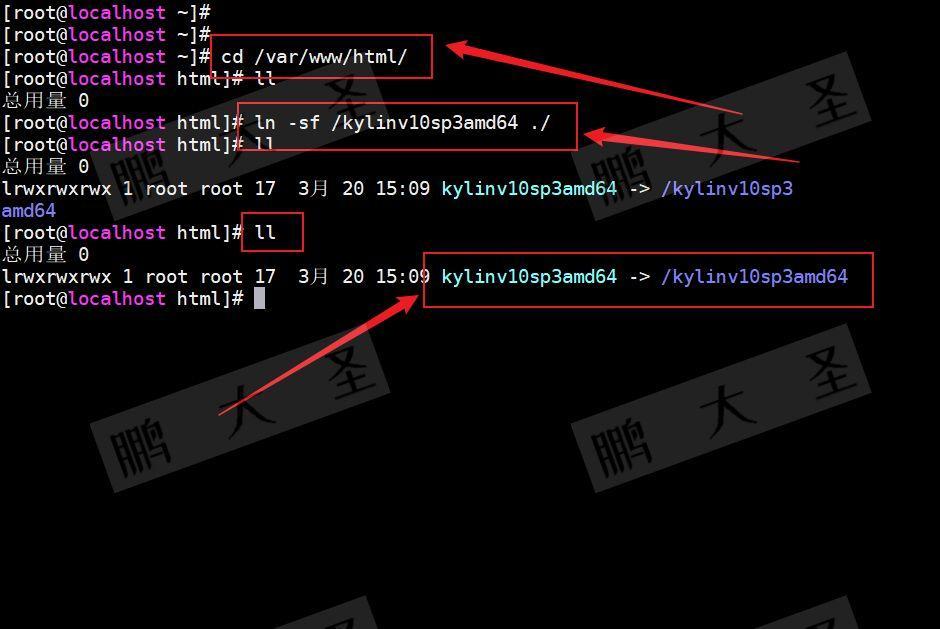
3.配置软连接
[root@localhost ~]# cd /var/www/html/
[root@localhost html]# ln  -sf  /kylinv10sp3amd64  ./
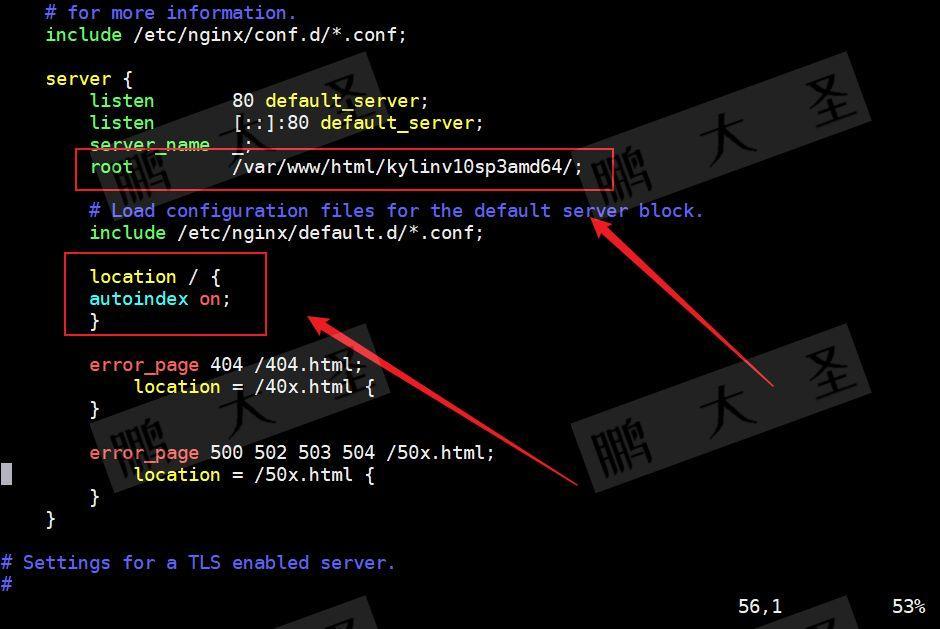
4.编辑nginx配置文件
[root@localhost /]# vim /etc/nginx/nginx.conf
[root@localhost /]# cat /etc/nginx/nginx.conf
# For more information on configuration, see:
#   * Official English Documentation: http://nginx.org/en/docs/
#   * Official Russian Documentation: http://nginx.org/ru/docs/user nginx;
worker_processes auto;
error_log /var/log/nginx/error.log;
pid /run/nginx.pid;# Load dynamic modules. See /usr/share/doc/nginx/README.dynamic.
include /usr/share/nginx/modules/*.conf;events {worker_connections 1024;
}http {log_format  main  '$remote_addr - $remote_user [$time_local] "$request" ''$status $body_bytes_sent "$http_referer" ''"$http_user_agent" "$http_x_forwarded_for"';access_log  /var/log/nginx/access.log  main;sendfile            on;tcp_nopush          on;tcp_nodelay         on;keepalive_timeout   65;types_hash_max_size 2048;include             /etc/nginx/mime.types;default_type        application/octet-stream;# Load modular configuration files from the /etc/nginx/conf.d directory.# See http://nginx.org/en/docs/ngx_core_module.html#include# for more information.include /etc/nginx/conf.d/*.conf;server {listen       80 default_server;listen       [::]:80 default_server;server_name  _;root         /var/www/html/kylinv10sp3amd64/;# Load configuration files for the default server block.include /etc/nginx/default.d/*.conf;location / {autoindex on;}error_page 404 /404.html;location = /40x.html {}error_page 500 502 503 504 /50x.html;location = /50x.html {}}# Settings for a TLS enabled server.
#
#    server {
#        listen       443 ssl http2 default_server;
#        listen       [::]:443 ssl http2 default_server;
#        server_name  _;
#        root         /usr/share/nginx/html;
#
#        ssl_certificate "/etc/pki/nginx/server.crt";
#        ssl_certificate_key "/etc/pki/nginx/private/server.key";
#        ssl_session_cache shared:SSL:1m;
#        ssl_session_timeout  10m;
#        ssl_ciphers PROFILE=SYSTEM;
#        ssl_prefer_server_ciphers on;
#
#        # Load configuration files for the default server block.
#        include /etc/nginx/default.d/*.conf;
#
#        location / {
#        }
#
#        error_page 404 /404.html;
#            location = /40x.html {
#        }
#
#        error_page 500 502 503 504 /50x.html;
#            location = /50x.html {
#        }
#    }}
5.校验nginx语法
[root@localhost ~]# nginx -t
nginx: the configuration file /etc/nginx/nginx.conf syntax is ok
nginx: configuration file /etc/nginx/nginx.conf test is successful

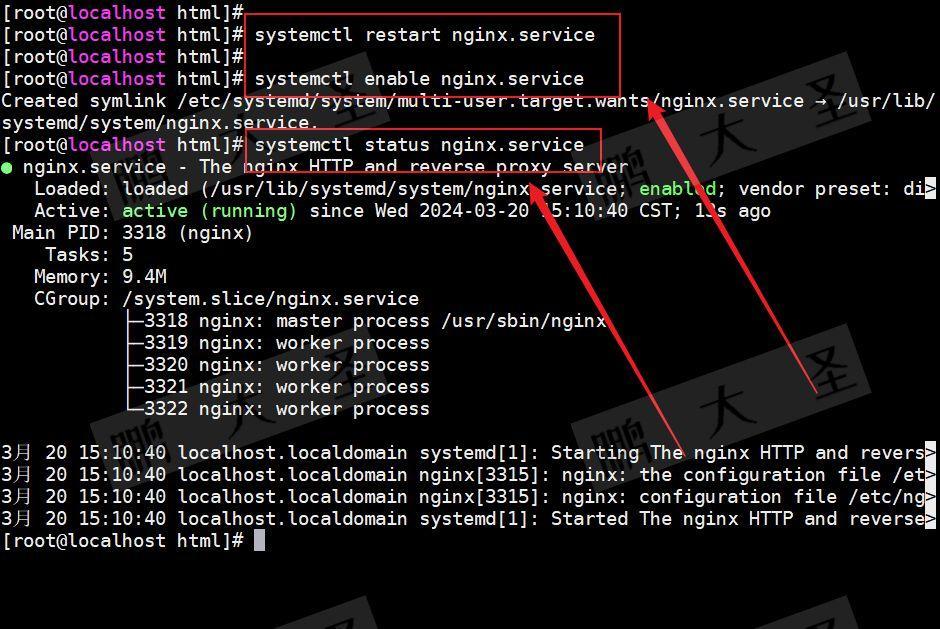
6.重启nginx服务
[root@localhost html]# systemctl restart nginx.service
[root@localhost html]# systemctl enable nginx.service
[root@localhost html]# systemctl status nginx.service
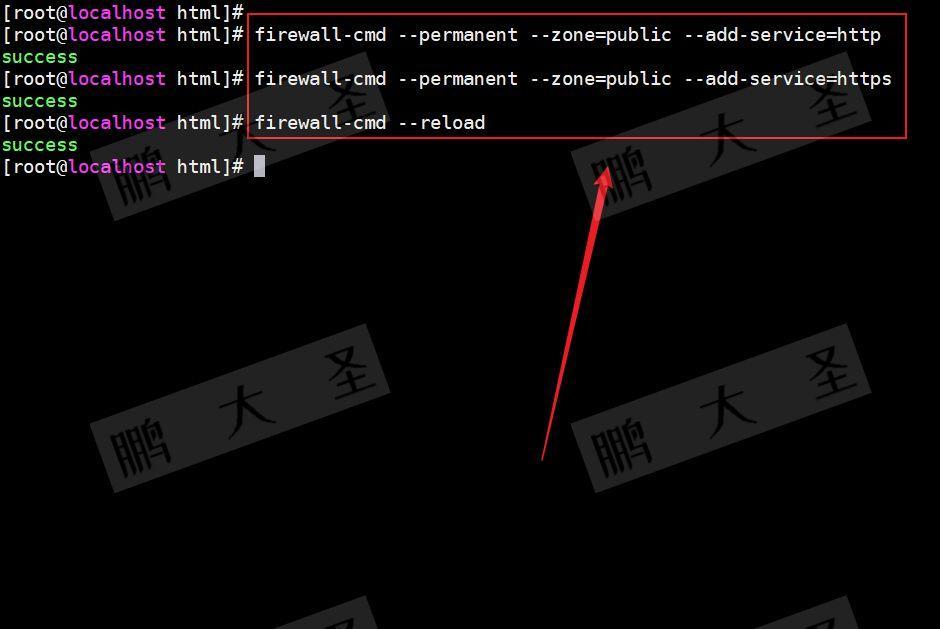
7.配置防火墙
[root@localhost html]# firewall-cmd --permanent --zone=public --add-service=http
[root@localhost html]# firewall-cmd --permanent --zone=public --add-service=https
[root@localhost html]# firewall-cmd --reload
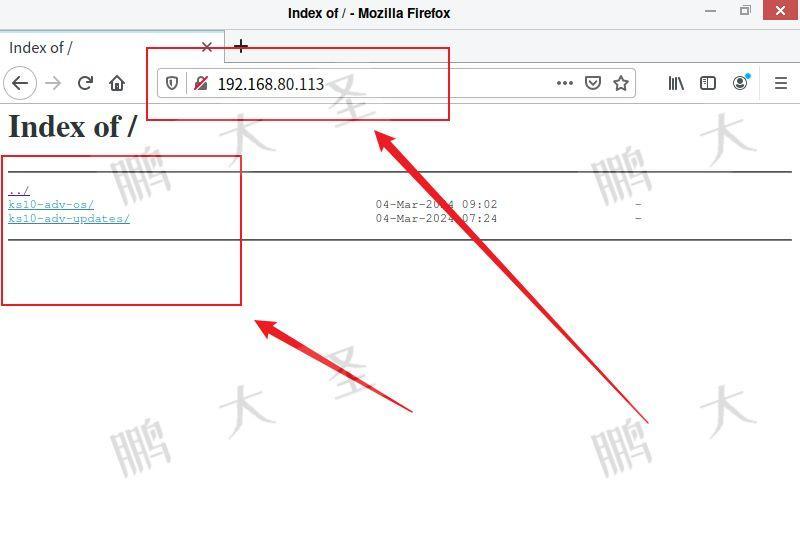
8.在浏览器访问测试
http://192.168.80.113/
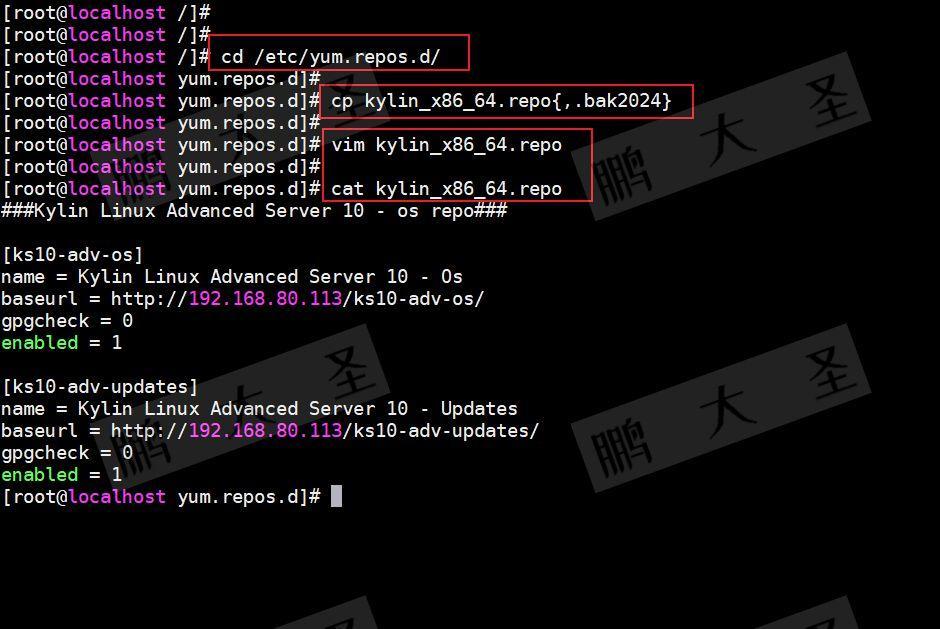
9.在其他服务器配置源
[root@localhost /]# cd /etc/yum.repos.d/
[root@localhost yum.repos.d]# cp kylin_x86_64.repo{,.bak2024}
[root@localhost yum.repos.d]# vim kylin_x86_64.repo
[root@localhost yum.repos.d]# cat kylin_x86_64.repo
###Kylin Linux Advanced Server 10 - os repo###[ks10-adv-os]
name = Kylin Linux Advanced Server 10 - Os
baseurl = http://192.168.80.113/ks10-adv-os/
gpgcheck = 0
enabled = 1[ks10-adv-updates]
name = Kylin Linux Advanced Server 10 - Updates
baseurl = http://192.168.80.113/ks10-adv-updates/
gpgcheck = 0
enabled = 1
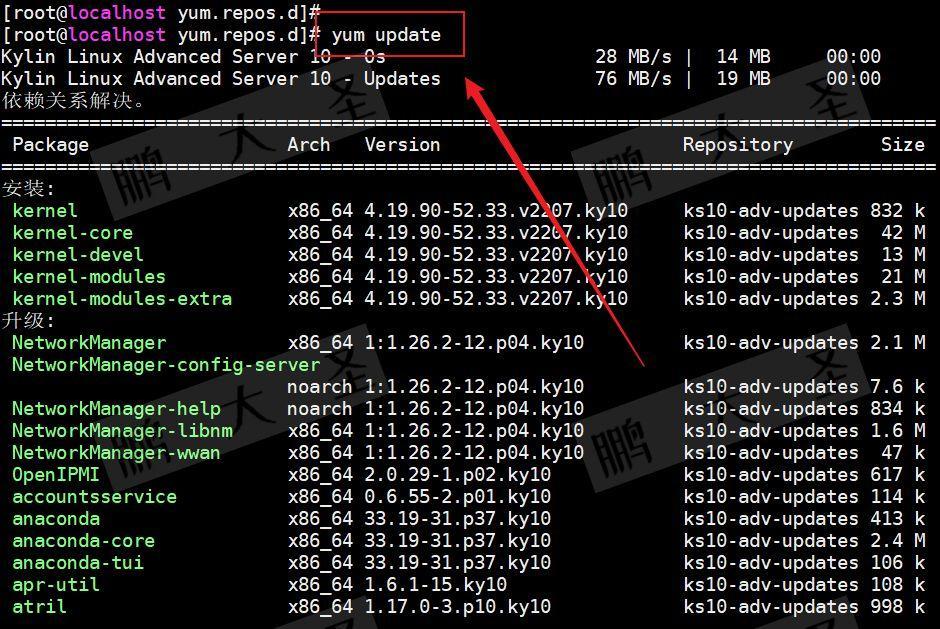
10.更新源
[root@localhost yum.repos.d]# yum update
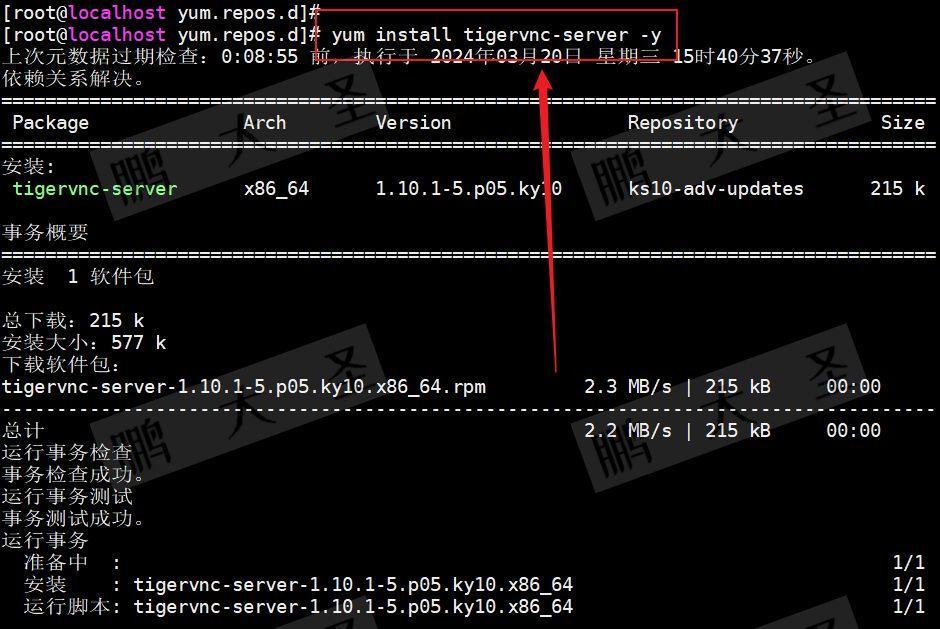
11.安装软件测试
[root@localhost yum.repos.d]# yum install tigervnc-server -y
至此,你已经成功配置了Nginx服务,将本地源共享给了其他服务器使用。这不仅能帮助你在内网环境中快速部署和更新软件,还能减轻公网源的负载,是一种高效且经济的解决方案。希望这篇文章对你有所帮助,如果你觉得有用,请不吝分享和转发。同时,别忘了点个关注和在看,获取更多有用的技术信息和解决方案。感谢大家的阅读,我们下次再见!


)

 应用场景和性能调优类)


——TCP协议的特性)


)

