第一步、安装wsl
详见我另一篇安装wsl文章。
第二步、安装centos
这里推荐两种方式,一种是从微软商城安装,一种是使用提前准备好的镜像安装,详见我另一篇windos下安装centos教程。
第三步、安装windows下的Docker desktop
详见我另一篇windows下安装docker desktop教程。
第四步、安装IBMMQ
4.1 下载镜像
docker run --env LICENSE=accept --env MQ_QMGR_NAME=QM1 --publish 1414:1414 --publish 9443:9443 --detach ibmcom/mq4.2 启动镜像

4.3 常用命令
runmqsc
def chl(my_channel) chltype(rcvr) trptype(tcp) replace
Start chl(my_channel)
Stop chl(my_channel)
dis chs(my_channel)
第五步、使用IBM MQ Explorer可视化工具连接
5.1 下载IBM MQ Explorer
第一种方法:官网下载。
IBM DocumentationOn Windows, you can install the stand-alone IBM MQ Explorer by using the graphical user interface. Alternatively, you can install IBM MQ Explorer with either a silent or a console installation.![]() https://www.ibm.com/docs/zh/ibm-mq/9.3?topic=windows-installing-stand-alone-mq-explorer
https://www.ibm.com/docs/zh/ibm-mq/9.3?topic=windows-installing-stand-alone-mq-explorer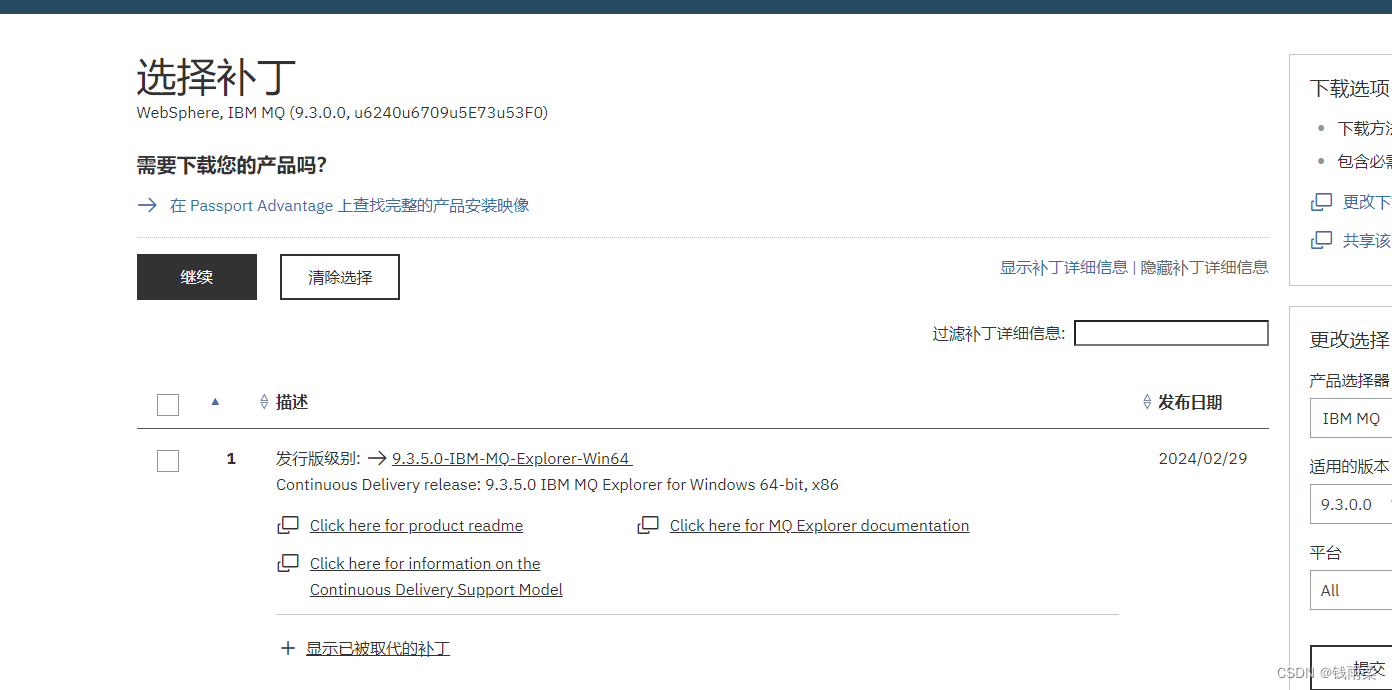 第二种方法:下载我已经准备好的独立安装包
https://download.csdn.net/download/s13353955305/88955424
5.2 启动IBM MQ Explore
在快速启动栏,选择“MQ Explorer”启动即可,如下:

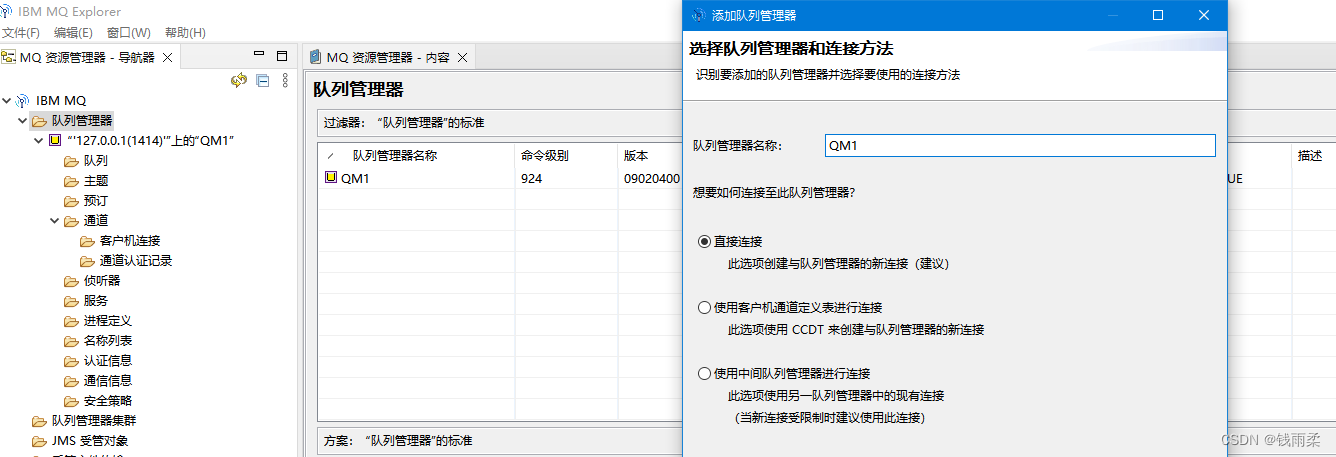
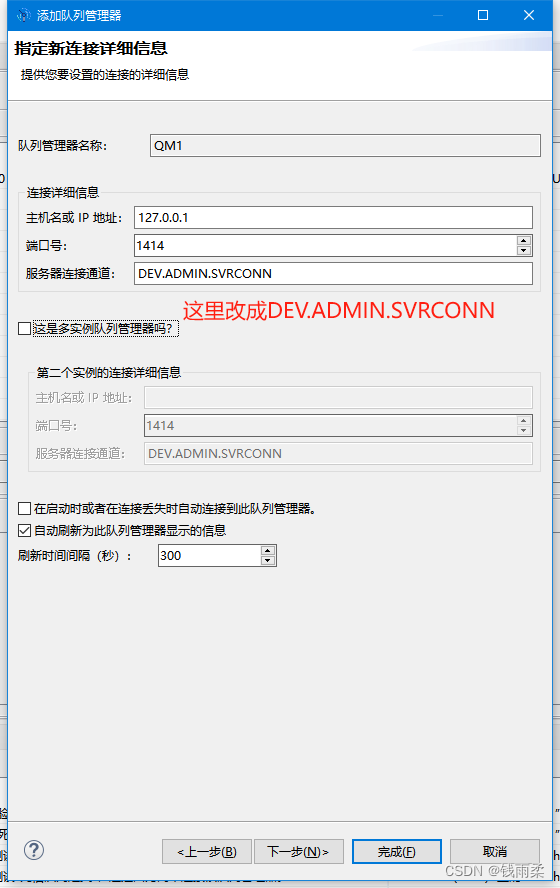
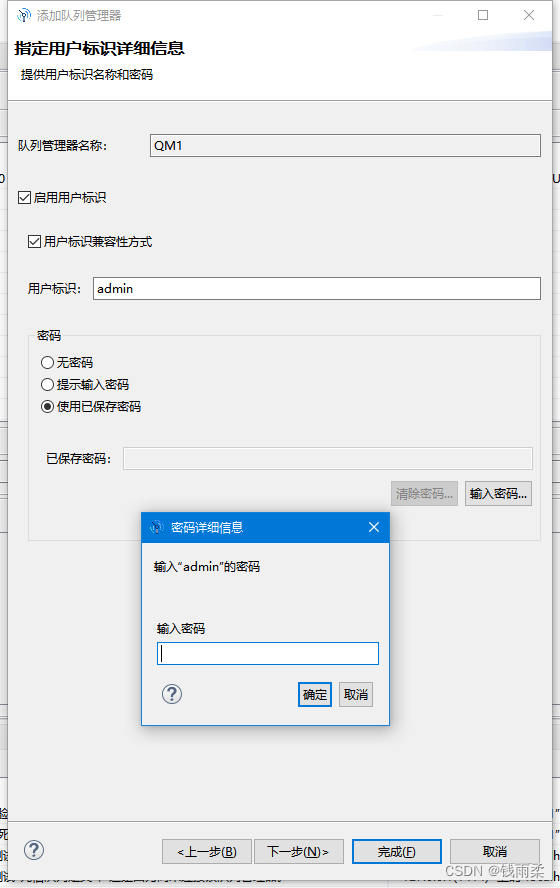
5.3 添加远程队列管理器
默认用户名:admin
默认密码:passw0rd
常见问题:
1.如果下载镜像的时候卡死了,再试进度条也不动的话,只需要重启一下docker desktop软件就行。

:分布式ID生成方法)


加速github访问)


)