? 这是第 75篇不掺水的原创,想要了解更多,请戳上方蓝色字体:政采云前端团队关注我们吧~

本文首发于政采云前端团队博客:告别复制粘贴:动态模板生成小技巧
https://www.zoo.team/article/dynamic-template-generation

前言
在日常开发中,我们需要不停的新建页面和组件。以 Vue 项目为例,我们在新建一个页面的时候,需要经历一遍又一遍重复的过程:
1、先新建一个文件夹
2、然后新建一个 .vue 文件,写上 、",
""
],"description": "vue-template"
}
}
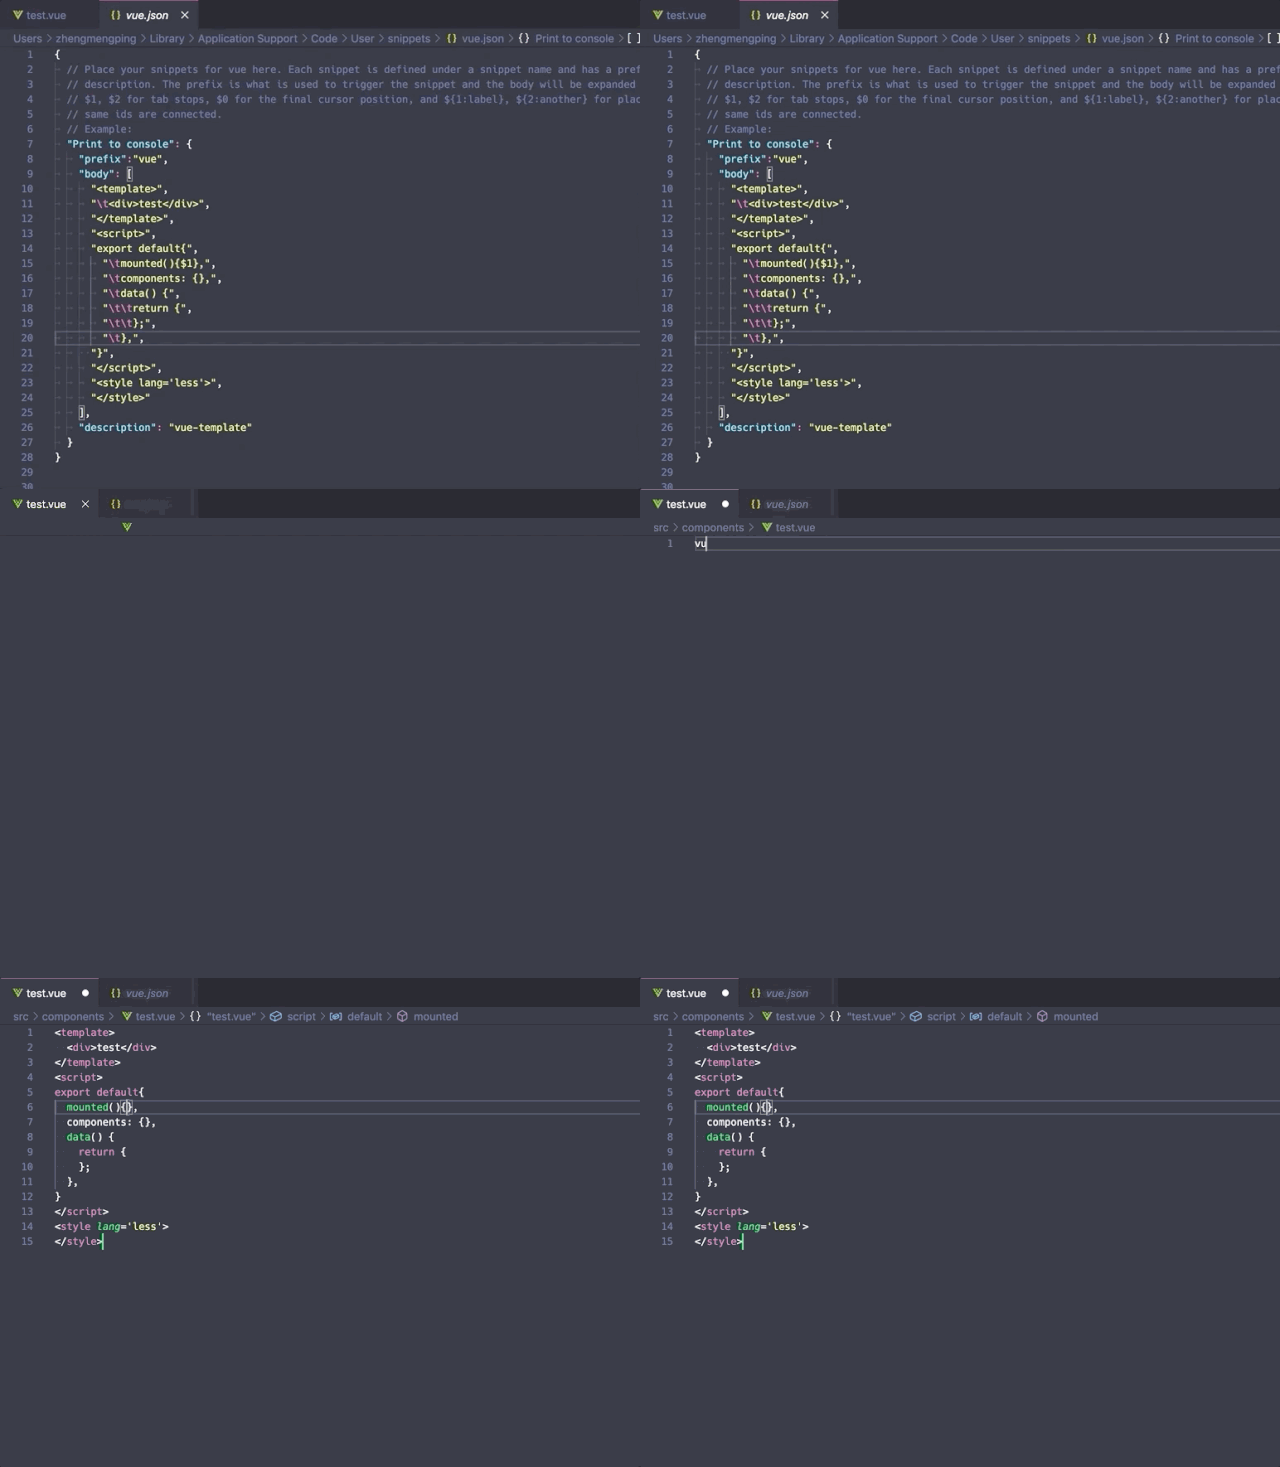
效果展示如下:

基于 plop 自定义基础的文件模板
plop的介绍可以看 plop官网:https://plopjs.com/documentation/),plop 功能主要是基于 inquirer (https://github.com/SBoudrias/Inquirer.js/) 和 handlebars (https://github.com/handlebars-lang/handlebars.js) 。
简单的说,plop 这个轻量的脚手架就是通过提前配置好要生成的页面模板,并且在命令行中接受指定的参数,从而生成我们需要的模板。
- 在项目中安装 plop
npm install --save-dev plop
- 项目根目录下新建
plopfile.js
module.exports = function(plop){
  plop.setGenerator('test',{ // 这里的 test 是一个自己设定的名字,在执行命令行的时候会用到
      description: 'generate a test', // 这里是对这个plop的功能描述
      prompts: [
        {
          type: 'input', // 问题的类型
          name: 'name', // 问题对应得到答案的变量名,可以在actions中使用该变量
          message: 'view name please', // 在命令行中的问题
          default: 'test' // 问题的默认答案
        }
      ],
      actions: data => {
          const name = '{{name}}';
          const actions = [
          {
              type: 'add', // 操作类型,这里是添加文件
              path: `src/views/${name}/index.vue`, // 模板生成的路径
              templateFile: 'plop-templates/view/index.hbs', // 模板的路径
              data: {
                name: name
              }
          }
        ];
        return actions;
      }
    });
}
- 在根目录下创建 plop-templates 文件夹,并在 plop-templates/view 里新建一个index.hbs
<div />
</template>Activity生命周期)


MD5加密)

WebView网页)


Android中封装View提供接口供点击事件回调的方法及使用)


)
