第一部分
1、初始化项目
npm init vite@latest
npm run dev :运行项目
q+Enter:退出运行
2、安装路由依赖
npm install vue-router@4 # Vue3 对应 vue-router 4.x 版本
第二部分:
创建页面组件
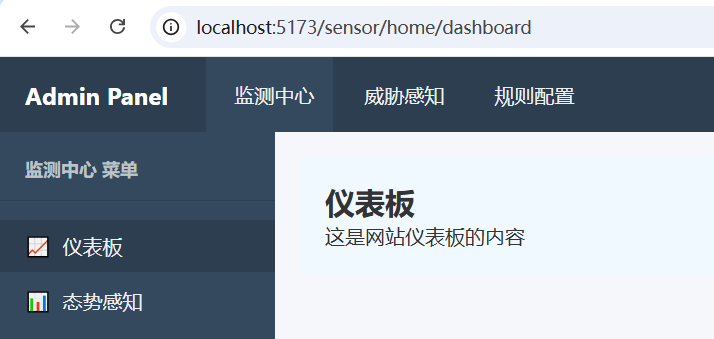
仪表板(dashboard.vue)
<template><div class="page home-page"><h2>仪表板</h2><p>这是网站仪表板的内容</p></div>
</template><style scoped>
.page {padding: 20px;
}
.home-page {background-color: #f0f9ff;
}
</style>
态势感知(situation.vue)
<template><div class="page home-page"><h2>态势感知</h2><p>这是网站态势感知的内容</p></div>
</template><style scoped>
.page {padding: 20px;
}
.home-page {background-color: #f0f9ff;
}
</style>
在 src/views/threat/ 目录下创建7个页面组件:alarm.vue、application.vue、attack.vue、equipment.vue、file.vue、mining.vue、system.vue
在 src/views/rule-config 目录下创建3个页面组件:backdoorRule.vue、idsRule.vue、rule.vue
在 src/views/rule-config/iocRule 目录下创建2个页面组件:threat_intelligence.vue、vuln_rule.vue
内容除了中文部分其他都一样。
<template><div class="page about-page"><h2>告警列表</h2><p>这是告警列表页面内容</p></div>
</template><style scoped>
.page {padding: 20px;
}
.about-page {background-color: #fff0f0;
}
</style>
创建导航组件
<template><ul class="menu-list"><li v-for="item in menuList" :key="item.name" class="menu-item"><div class="menu-link" :class="{ active: isActive(item) }"@click="handleClick(item)"><span class="icon">{{ item.icon }}</span><span class="text">{{ item.name }}</span><span class="arrow" v-if="isSubMenu(item) && item.children && item.children.length":class="{ 'arrow-open': isOpen(item) }">▶</span></div><template v-if="isSubMenu(item) && item.children && item.children.length"><SubMenuRecursive :menu-list="item.children" :parent-path="getItemPath(item)"v-show="isOpen(item)"/></template></li></ul>
</template><script setup lang="ts">
import { ref,computed } from "vue";
import { useRoute, useRouter } from "vue-router";
import type { SubMenu, ThirdMenu } from "../router/menu";
import SubMenuRecursive from "./SubMenuRecursive.vue"; // 补充自身导入(递归组件需要)// 类型守卫:严格判断是否为 SubMenu(有 children 属性)
const isSubMenu = (item: SubMenu | ThirdMenu): item is SubMenu => {return 'children' in item && Array.isArray(item.children);
};// 接收父组件传入的菜单列表和父路径
const props = defineProps<{menuList: (SubMenu | ThirdMenu)[];parentPath?: string;expandedKeys?: string[];  // 父组件传递的展开状态(不再自己定义)
}>();// 2. 定义自定义事件,用于向父组件更新状态
const emit = defineEmits<{"update:expandedKeys": (newExpandedKeys: string[]) => void;
}>();const route = useRoute();
const router = useRouter();// 判断菜单项是否激活
const isActive = (item: SubMenu | ThirdMenu) => {const itemPath = getItemPath(item);return itemPath && route.path.startsWith(itemPath);
};// 3. 修改 isOpen 函数,基于父组件传递的 expandedKeys 判断
const isOpen = (item: SubMenu | ThirdMenu) => {return isSubMenu(item) && props.expandedKeys.includes(item.name);
};// 获取菜单项的路径(用于路由跳转)
const getItemPath = (item: SubMenu | ThirdMenu) => {if (isSubMenu(item) && item.children && item.children.length > 0) { // 增加 length > 0 判断return item.children[0]!.path; // 此时 children[0] 一定存在
  }return item.path;
};// 4. 修改 handleClick 函数,触发父组件更新展开状态
const handleClick = (item: SubMenu | ThirdMenu) => {const itemPath = item.path;if (itemPath) {router.push(itemPath);}// 切换展开状态时,通知父组件更新if (isSubMenu(item) && item.children && item.children.length) {// 复制父组件的展开状态(避免直接修改 props)const newExpandedKeys = [...props.expandedKeys];const index = newExpandedKeys.indexOf(item.name);if (index > -1) {newExpandedKeys.splice(index, 1);} else {newExpandedKeys.push(item.name);}// 向父组件发送更新后的状态emit("update:expandedKeys", newExpandedKeys);}
};</script><style scoped>
/* 样式保持不变 */
.menu-list {list-style: none;padding: 0;margin: 0;
}.menu-item {margin: 2px 0;
}.menu-link {display: flex;align-items: center;gap: 10px;padding: 10px 20px;color: #ecf0f1;cursor: pointer;transition: background-color 0.2s;
}.menu-link:hover, .menu-link.active {background-color: #2c3e50;
}.icon {width: 20px;text-align: center;
}.arrow {margin-left: auto;font-size: 12px;transition: transform 0.2s;
}.arrow-open {transform: rotate(90deg);
}/* 三级菜单缩进 */
.menu-list .menu-list {padding-left: 20px;border-left: 1px dashed #4a6988;
}
</style>
在 src/layouts 目录下创建导航栏组件 MainLayout.vue
<template><div class="layout-container"><header class="top-nav"><div class="logo">Admin Panel</div><nav class="main-menu"><router-linkv-for="menu in mainMenus":key="menu.path":to="menu.path"class="main-menu-item":class="{ active: isMainMenuActive(menu) }"><span class="icon">{{ menu.icon }}</span><span class="text">{{ menu.name }}</span></router-link></nav></header><div class="content-wrapper"><aside class="sidebar"><div class="sidebar-header"><h3>{{ currentMainMenu?.name }} 菜单</h3></div><nav class="sub-menu"><SubMenuRecursive :menu-list="currentSubMenus" :expanded-keys="expandedKeys" @update:expanded-keys="handleExpandedKeysUpdate" ></SubMenuRecursive> </nav></aside><main class="main-content"><router-view /></main></div></div>
</template><script setup lang="ts">
import { ref, watch } from "vue";
import { useRoute } from "vue-router";
import type { MainMenu, SubMenu } from "../router/menu";
import { mainMenus } from "../router/menu";
import SubMenuRecursive from "../components/SubMenuRecursive.vue";const route = useRoute();
// 先获取第一个菜单,不存在则用默认值
const firstMenu = mainMenus[0] || { name: "", path: "", subMenus: [] } as MainMenu;// 用 firstMenu 初始化,避免 undefined
const currentMainMenu = ref<MainMenu | null>(firstMenu);
const currentSubMenus = ref<SubMenu[]>(firstMenu.subMenus);// 检查一级菜单是否激活
const isMainMenuActive = (menu: MainMenu) => {return route.path.startsWith(menu.path);
};// 1. 提升展开状态到父组件(全局唯一,对应当前一级菜单的下级菜单展开状态)
const expandedKeys = ref<string[]>([]);// 2. 接收子组件的展开状态更新(子组件点击二级菜单时触发)
const handleExpandedKeysUpdate = (newExpandedKeys: string[]) => {expandedKeys.value = newExpandedKeys;
};// 路由变化时更新当前菜单
watch(() => route.path,(newPath) => {const matchedMainMenu = mainMenus.find((menu) => newPath.startsWith(menu.path));if (matchedMainMenu) {currentMainMenu.value = matchedMainMenu;currentSubMenus.value = matchedMainMenu.subMenus;// 关键:重置展开状态(清空旧状态)expandedKeys.value = [];// 可选:初始化时自动展开当前路由对应的父菜单(复用原 initExpanded 逻辑)
      initExpanded(matchedMainMenu.subMenus, newPath);}},{ immediate: true }
);// 新增初始化函数
const initExpanded = (menuList: (SubMenu | ThirdMenu)[], currentPath: string) => {const findParent = (list: (SubMenu | ThirdMenu)[]) => {list.forEach((item) => {if (isSubMenu(item) && item.children && item.children.length) {const hasActiveChild = item.children.some((child) => currentPath.startsWith(child.path));if (hasActiveChild) {expandedKeys.value.push(item.name);}findParent(item.children);}});};findParent(menuList);
};// 辅助:需要在父组件中引入 isSubMenu 类型守卫(或直接复制逻辑)
const isSubMenu = (item: SubMenu | ThirdMenu): item is SubMenu => {return 'children' in item && Array.isArray(item.children);
};
</script><style scoped>
.layout-container {display: flex;flex-direction: column;min-height: 100vh;color: #333;
}/* 顶部导航 */
.top-nav {display: flex;align-items: center;height: 60px;background-color: #2c3e50;color: white;padding: 0 20px;box-shadow: 0 2px 4px rgba(0, 0, 0, 0.1);
}.logo {font-size: 1.2rem;font-weight: bold;margin-right: 30px;
}.main-menu {display: flex;gap: 2px;
}.main-menu-item {display: flex;align-items: center;gap: 8px;padding: 0 15px;height: 60px;color: #ecf0f1;text-decoration: none;transition: background-color 0.2s;
}.main-menu-item:hover, .main-menu-item.active {background-color: #34495e;
}/* 内容区 */
.content-wrapper {display: flex;flex: 1;
}/* 侧边栏 */
.sidebar {width: 220px;background-color: #34495e;color: white;padding: 20px 0;
}.sidebar-header {padding: 0 20px 15px;border-bottom: 1px solid #2c3e50;margin-bottom: 15px;
}.sidebar-header h3 {font-size: 0.9rem;color: #bdc3c7;margin: 0;
}/* 主内容区 */
.main-content {flex: 1;padding: 20px;background-color: #f5f7fa;overflow-y: auto;
}
</style>
配置路由
menu.ts
// 1. 三级菜单接口(直接导出)
export interface ThirdMenu {name: string;path: string;icon?: string;
}// 2. 二级菜单接口(直接导出)
export interface SubMenu {name: string;path?: string;icon?: string;children?: ThirdMenu[];
}// 3. 一级菜单接口(直接导出)
export interface MainMenu {name: string;path: string;icon?: string;subMenus: SubMenu[];
}// 4. 菜单数据(直接使用接口类型标注)
export const mainMenus: MainMenu[] = [{name: "监测中心",path: "/sensor/home",subMenus: [{ name: "仪表板", icon: "📈",path: "/sensor/home/dashboard"},{ name: "态势感知", icon: "📊",path: "/sensor/home/situation"},]},{name: "威胁感知",path: "/sensor/threat",subMenus: [{ name: "告警列表", path: "/sensor/threat/alarm",icon: "📋"},{name: "威胁视角", icon: "👀",children: [{ name: "挖矿专项", path: "/sensor/threat/mining"},{ name: "文件安全", path: "/sensor/threat/file"},{ name: "应用安全", path: "/sensor/threat/application"},{ name: "系统安全", path: "/sensor/threat/system"},{ name: "设备安全", path: "/sensor/threat/equipment"}]},{ name: "攻击者视角", path: "/sensor/threat/attack",icon: "⚔️"}]},{name: "规则配置",path: "/sensor/rule-config",subMenus: [{ name: "网络漏洞利用", path: "/sensor/rule-config/rule",icon: "🕳️"},{ name: "webshell上传", path: "/sensor/rule-config/backdoorRule",icon: "⬆️"},{ name: "网络攻击", path: "/sensor/rule-config/idsRule",icon: "🌐"},{name: "自定义规则", icon: "👾",children: [{ name: "漏洞规则", path: "/sensor/rule-config/iocRule/vuln_rule"},{ name: "威胁情报", path: "/sensor/rule-config/iocRule/threat_intelligence"}]}]}
];
index.ts
import { createRouter, createWebHistory, type RouteRecordRaw } from "vue-router";
import Layout from "../layouts/MainLayout.vue";
import type { MainMenu, SubMenu, ThirdMenu } from "./menu";
import {mainMenus} from "./menu";// 导入所有视图组件(非动态导入方式)
import Dashboard from "../views/home/dashboard.vue";
import Situation from "../views/home/situation.vue";import Alarm from "../views/threat/alarm.vue";
import Mining from "../views/threat/mining.vue";
import File from "../views/threat/file.vue";
import Application from "../views/threat/application.vue";
import System from "../views/threat/system.vue";
import Equipment from "../views/threat/equipment.vue";
import Attack from "../views/threat/attack.vue";import Rule from "../views/rule-config/rule.vue";
import BackdoorRule from "../views/rule-config/backdoorRule.vue";
import IdsRule from "../views/rule-config/idsRule.vue";
import VulnRule from "../views/rule-config/iocRule/vuln_rule.vue";
import ThreatIntelligence from "../views/rule-config/iocRule/threat_intelligence.vue";// 组件映射表(路径 -> 组件)
const componentMap: Record<string, any> = {"/sensor/home/dashboard": Dashboard,"/sensor/home/situation": Situation,"/sensor/threat/alarm": Alarm,"/sensor/threat/mining": Mining,"/sensor/threat/file": File,"/sensor/threat/application": Application,"/sensor/threat/system": System,"/sensor/threat/equipment": Equipment,"/sensor/threat/attack": Attack,"/sensor/rule-config/rule":Rule,"/sensor/rule-config/backdoorRule":BackdoorRule,"/sensor/rule-config/idsRule":IdsRule,"/sensor/rule-config/iocRule/vuln_rule":VulnRule,"/sensor/rule-config/iocRule/threat_intelligence":ThreatIntelligence
};// 递归生成路由(支持三级菜单)
const generateRoutes = (): RouteRecordRaw[] => {const routes: RouteRecordRaw[] = [{path: "/",component: Layout,children: [],},];// 处理一级菜单mainMenus.forEach((mainMenu: MainMenu) => {// 一级菜单默认重定向到第一个三级菜单const firstSub = mainMenu.subMenus[0]!;const firstThird = firstSub.children?.[0] || firstSub;routes[0]!.children!.push({path: mainMenu.path,redirect: firstThird.path!,});// 处理二级和三级菜单mainMenu.subMenus.forEach((subMenu: SubMenu) => {// 若二级菜单有三级菜单,生成二级路由组if (subMenu.children && subMenu.children.length > 0) {subMenu.children.forEach((thirdMenu: ThirdMenu) => {routes[0]!.children!.push({path: thirdMenu.path!,component: componentMap[thirdMenu.path!],});});} else if (subMenu.path) {// 若二级菜单无三级菜单,直接生成路由routes[0]!.children!.push({path: subMenu.path,component: componentMap[subMenu.path],});}});});return routes;
};const router = createRouter({history: createWebHistory(import.meta.env.BASE_URL),routes: generateRoutes(),
});export default router;
修改根组件(App.vue)

<template><router-view />
</template><script setup lang="ts"></script><style>
* {margin: 0;padding: 0;box-sizing: border-box;font-family: 'Segoe UI', sans-serif;
}body {background-color: #f5f7fa;
}
</style>
配置入口文件(main.ts)
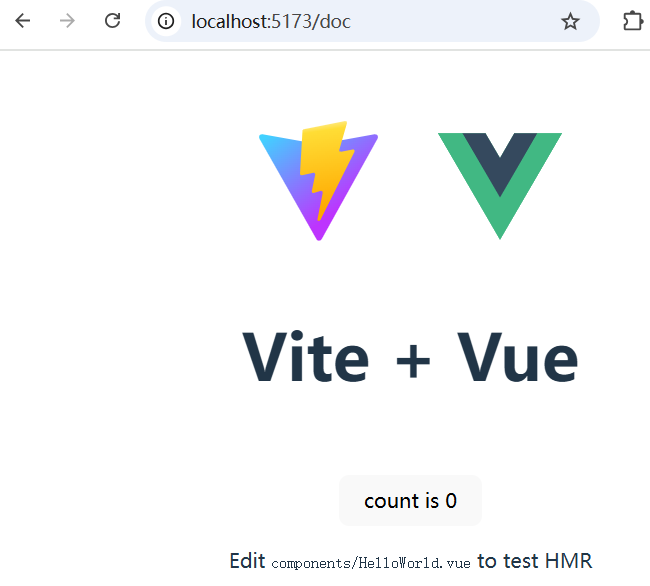
清空项目自带的src/style.css文件,执行 npm run dev 启动项目,访问 http://localhost:5173 会看到:
项目笔记
1、SubMenuRecursive.vue有如下代码,什么功能?
// 2. 定义自定义事件,用于向父组件更新状态
const emit = defineEmits<{"update:expandedKeys": (newExpandedKeys: string[]) => void;
}>();


![[USACO18JAN] G/S 题解](http://pic.xiahunao.cn/[USACO18JAN] G/S 题解)


![P7912 [CSP-J 2021] 小熊的果篮](http://pic.xiahunao.cn/P7912 [CSP-J 2021] 小熊的果篮)

【在使用Xshell通过SSH连接时遇到 “服务器发送了一个意外的数据包。receives:3,expected:20”错误】问题解决方法)


![[network] IPv4 vs. IPv6 address pool](http://pic.xiahunao.cn/[network] IPv4 vs. IPv6 address pool)
-- Webview访问总结)
![[Network] subnet mask](http://pic.xiahunao.cn/[Network] subnet mask)

