1. 部署安装pyfluent
Pyfluent支持Fluent 2022R2或更高版本,PyFluent支持Python 3.10~3.13版本,点击 此处 即可下载。
安装核心依赖需使用pip命令,如若详细了解该命令的使用,详见 此处
pip install ansys-fluent-core
pip install pyfluent
//如有需要可进一步安装
pip install ansys-fluent-parametric       //参数化求解
//如果安装失败,使用下面命令
pip install git+https://github.com/ansys/pyfluent-parametric.git
pip install ansys-fluent-visualization    //可视化后处理
//如果安装失败,使用下面命令
pip install git+https://github.com/ansys/pyfluent-visualization.git
如果出现下载异常或者速度较慢,可以更换国内pip镜像源,具体方法如下:
- 临时更换:
pip install package -i https://pypi.tuna.tsinghua.edu.cn/simple - 永久更换:
pip config set global.index-url https://pypi.tuna.tsinghua.edu.cn/simple
换回默认源:
pip config unset global.index-url
镜像源地址有:
清华大学TUNA镜像源: https://pypi.tuna.tsinghua.edu.cn/simple
阿里云镜像源: http://mirrors.aliyun.com/pypi/simple/
中国科学技术大学镜像源: https://mirrors.ustc.edu.cn/pypi/simple/
华为云镜像源: https://repo.huaweicloud.com/repository/pypi/simple/
腾讯云镜像源:https://mirrors.cloud.tencent.com/pypi/simple/
#官方镜像源:https://pypi.org/simple
安装完成之后,可进一步验证是否安装成功
//打开终端输入
D:\Program>python
Python 3.13.1 (tags/v3.13.1:0671451, Dec  3 2024, 19:06:28) [MSC v.1942 64 bit (AMD64)] on win32
Type "help", "copyright", "credits" or "license" for more information.
>>> import ansys.fluent.core as pyfluent
>>> session=pyfluent.launch_fluent(dimension = Dimension.THREE, processor_count = 4, ui_mode = UIMode.GUI)
//此时Fluent被打开,说明安装成功。
关于进一步的描述可以参见 简明讲义 详细了解,其中有些示例命令当前已经被弃用,但执行时会提示,比如
 session=pyfluent.launch_fluent(version = '3d', processor_count = 4, show_gui = True)
C:\Python313\Lib\site-packages\deprecated\classic.py:199: PyFluentDeprecationWarning: 'version' is deprecated. Use 'dimension' instead.return wrapped_(*args_, **kwargs_)
pyfluent.general WARNING: Using 'dimension = Dimension.THREE' for 'launch_fluent()' instead of 'version = 3d'.
C:\Python313\Lib\site-packages\ansys\fluent\core\utils\deprecate.py:118: PyFluentDeprecationWarning: 'show_gui' is deprecated. Use 'ui_mode' instead.return func(*args, **kwargs)
pyfluent.general WARNING: Using 'ui_mode = UIMode.GUI' for 'launch_fluent()' instead of 'show_gui = True'.
2. 代码实现
2.1 基于pyfluent实现网格参数自定义
以下内容来自 此处 ,翻译内容如下:
2.1.1 Watertight meshing workflow
(1)导入几何模型
import ansys.fluent.core as pyfluent
from ansys.fluent.core import examplesimport_file_name = examples.download_file('mixing_elbow.pmdb', 'pyfluent/mixing_elbow')
meshing_session = pyfluent.launch_fluent(mode=pyfluent.FluentMode.MESHING, precision=pyfluent.Precision.DOUBLE, processor_count=2
)
watertight = meshing_session.watertight()
watertight.import_geometry.file_name.set_state(import_file_name)
watertight.import_geometry.length_unit.set_state('in')
watertight.import_geometry()
(2)添加局部尺寸
watertight.add_local_sizing.add_child_to_task()
watertight.add_local_sizing()
(3)生成面网格
watertight.create_surface_mesh.cfd_surface_mesh_controls.max_size.set_state(0.3)
watertight.create_surface_mesh()
(4)几何描述
watertight.describe_geometry.update_child_tasks(setup_type_changed=False)
watertight.describe_geometry.setup_type.set_state("The geometry consists of only fluid regions with no voids")
watertight.describe_geometry.update_child_tasks(setup_type_changed=True)
watertight.describe_geometry()
(5)更新边界类型
watertight.update_boundaries.boundary_label_list.set_state(["wall-inlet"])
watertight.update_boundaries.boundary_label_type_list.set_state(["wall"])
watertight.update_boundaries.old_boundary_label_list.set_state(["wall-inlet"])
watertight.update_boundaries.old_boundary_label_type_list.set_state(["velocity-inlet"])
watertight.update_boundaries()
(6)更新区域
watertight.update_regions()
(7)添加边界层
watertight.add_boundary_layer.add_child_to_task()
watertight.add_boundary_layer.bl_control_name.set_state("smooth-transition_1")
watertight.add_boundary_layer.insert_compound_child_task()
watertight.add_boundary_layer_child_1()
(8)生成体网格
watertight.create_volume_mesh.volume_fill.set_state("poly-hexcore")
watertight.create_volume_mesh.volume_fill_controls.hex_max_cell_length.set_state(0.3)
watertight.create_volume_mesh()
(9)切换至求解模式
solver_session = meshing_session.switch_to_solver()
2.1.2 Fault-tolerant meshin workflow
对于需要清理或修改的复杂CAD几何体(例如处理重叠、相交、孔洞和重复元素),请使用容错网格划分工作流程。以下示例演示了如何使用容错工作流程。
(1)导入几何模型以及零部件管理
import ansys.fluent.core as pyfluent
from ansys.fluent.core import examplesimport_file_name = examples.download_file("exhaust_system.fmd", "pyfluent/exhaust_system"
)
meshing_session = pyfluent.launch_fluent(precision=pyfluent.Precision.DOUBLE, processor_count=2, mode=pyfluent.FluentMode.MESHING)
fault_tolerant = meshing_session.fault_tolerant()
meshing_session.PartManagement.InputFileChanged(FilePath=import_file_name, IgnoreSolidNames=False, PartPerBody=False
)
meshing_session.PMFileManagement.FileManager.LoadFiles()
meshing_session.PartManagement.Node["Meshing Model"].Copy(Paths=["/dirty_manifold-for-wrapper," + "1/dirty_manifold-for-wrapper,1/main,1","/dirty_manifold-for-wrapper," + "1/dirty_manifold-for-wrapper,1/flow-pipe,1","/dirty_manifold-for-wrapper," + "1/dirty_manifold-for-wrapper,1/outpipe3,1","/dirty_manifold-for-wrapper," + "1/dirty_manifold-for-wrapper,1/object2,1","/dirty_manifold-for-wrapper," + "1/dirty_manifold-for-wrapper,1/object1,1",]
)
meshing_session.PartManagement.ObjectSetting["DefaultObjectSetting"].OneZonePer.set_state("part")
fault_tolerant.import_cad_and_part_management.context.set_state(0)
fault_tolerant.import_cad_and_part_management.create_object_per.set_state("Custom")
fault_tolerant.import_cad_and_part_management.fmd_file_name.set_state(import_file_name)
fault_tolerant.import_cad_and_part_management.file_loaded.set_state("yes")
fault_tolerant.import_cad_and_part_management.object_setting.set_state("DefaultObjectSetting")
fault_tolerant.import_cad_and_part_management()
(2)几何与流动描述
fault_tolerant.describe_geometry_and_flow.add_enclosure.set_state("No")
fault_tolerant.describe_geometry_and_flow.close_caps.set_state("Yes")
fault_tolerant.describe_geometry_and_flow.describe_geometry_and_flow_options.advanced_options.set_state(True)
fault_tolerant.describe_geometry_and_flow.describe_geometry_and_flow_options.extract_edge_features.set_state("Yes")
fault_tolerant.describe_geometry_and_flow.flow_type.set_state("Internal flow through the object")
fault_tolerant.describe_geometry_and_flow.update_child_tasks(setup_type_changed=False)
fault_tolerant.describe_geometry_and_flow()
(3)封闭流体区域
fault_tolerant.enclose_fluid_regions_fault.create_patch_preferences.show_create_patch_preferences.set_state(False)fault_tolerant.enclose_fluid_regions_fault.patch_name.set_state("inlet-1")
fault_tolerant.enclose_fluid_regions_fault.selection_type.set_state("zone")
fault_tolerant.enclose_fluid_regions_fault.zone_selection_list.set_state(["inlet.1"])
fault_tolerant.enclose_fluid_regions_fault.insert_compound_child_task()
fault_tolerant.enclose_fluid_regions_fault_child_1()fault_tolerant.enclose_fluid_regions_fault.patch_name.set_state("inlet-2")
fault_tolerant.enclose_fluid_regions_fault.selection_type.set_state("zone")
fault_tolerant.enclose_fluid_regions_fault.zone_selection_list.set_state(["inlet.2"])
fault_tolerant.enclose_fluid_regions_fault.insert_compound_child_task()
fault_tolerant.enclose_fluid_regions_fault_child_2()fault_tolerant.enclose_fluid_regions_fault.patch_name.set_state("inlet-3")
fault_tolerant.enclose_fluid_regions_fault.selection_type.set_state("zone")
fault_tolerant.enclose_fluid_regions_fault.zone_selection_list.set_state(["inlet"])
fault_tolerant.enclose_fluid_regions_fault.insert_compound_child_task()
fault_tolerant.enclose_fluid_regions_fault_child_3()fault_tolerant.enclose_fluid_regions_fault.patch_name.set_state("outlet-1")
fault_tolerant.enclose_fluid_regions_fault.selection_type.set_state("zone")
fault_tolerant.enclose_fluid_regions_fault.zone_selection_list.set_state(["outlet"])
fault_tolerant.enclose_fluid_regions_fault.zone_type.set_state("pressure-outlet")
fault_tolerant.enclose_fluid_regions_fault.insert_compound_child_task()
fault_tolerant.enclose_fluid_regions_fault_child_4()
(4)提取边缘特征
fault_tolerant.extract_edge_features.extract_edges_name.set_state("edge-group-1")
fault_tolerant.extract_edge_features.extract_method_type.set_state("Intersection Loops")
fault_tolerant.extract_edge_features.object_selection_list.set_state(["flow_pipe", "main"])
fault_tolerant.extract_edge_features.insert_compound_child_task()
fault_tolerant.extract_edge_features_child_1()
(5)识别区域
fault_tolerant.identify_regions.show_coordinates = True
fault_tolerant.identify_regions.material_points_name.set_state("fluid-region-1")
fault_tolerant.identify_regions.selection_type.set_state("zone")
fault_tolerant.identify_regions.x.set_state(377.322045740589)
fault_tolerant.identify_regions.y.set_state(-176.800676988458)
fault_tolerant.identify_regions.z.set_state(-37.0764628583475)
fault_tolerant.identify_regions.zone_selection_list.set_state(["main.1"])
fault_tolerant.identify_regions.insert_compound_child_task()
fault_tolerant.identify_regions_child_1()fault_tolerant.identify_regions.show_coordinates = True
fault_tolerant.identify_regions.material_points_name.set_state("void-region-1")
fault_tolerant.identify_regions.new_region_type.set_state("void")
fault_tolerant.identify_regions.object_selection_list.set_state(["inlet-1", "inlet-2", "inlet-3", "main"])
fault_tolerant.identify_regions.x.set_state(374.722045740589)
fault_tolerant.identify_regions.y.set_state(-278.9775145640143)
fault_tolerant.identify_regions.z.set_state(-161.1700719416913)
fault_tolerant.identify_regions.insert_compound_child_task()
fault_tolerant.identify_regions_child_2()
(6)定义泄露阈值
fault_tolerant.define_leakage_threshold.add_child.set_state("yes")
fault_tolerant.define_leakage_threshold.flip_direction.set_state(True)
fault_tolerant.define_leakage_threshold.plane_direction.set_state("X")
fault_tolerant.define_leakage_threshold.region_selection_single.set_state("void-region-1")fault_tolerant.define_leakage_threshold.arguments.set_state({'add_child': 'yes','flip_direction': True,'leakage_name': 'leakage-1','plane_direction': 'X','region_selection_single': ['void-region-1'],}
)
fault_tolerant.define_leakage_threshold.insert_compound_child_task()
fault_tolerant.define_leakage_threshold_child_1()
(7)更新区域设置
fault_tolerant.update_region_settings.all_region_filter_categories.set_state(["2"] * 5 + ["1"] * 2)
fault_tolerant.update_region_settings.all_region_leakage_size_list.set_state(["none"] * 6 + ["6.4"])
fault_tolerant.update_region_settings.all_region_linked_construction_surface_list.set_state(["n/a"] * 6 + ["no"])
fault_tolerant.update_region_settings.all_region_mesh_method_list.set_state(["none"] * 6 + ["wrap"])
fault_tolerant.update_region_settings.all_region_name_list.set_state(["main","flow_pipe","outpipe3","object2","object1","void-region-1","fluid-region-1",])
fault_tolerant.update_region_settings.all_region_overset_componen_list.set_state(["no"] * 7)
fault_tolerant.update_region_settings.all_region_source_list.set_state(["object"] * 5 + ["mpt"] * 2)
fault_tolerant.update_region_settings.all_region_type_list.set_state(["void"] * 6 + ["fluid"])
fault_tolerant.update_region_settings.all_region_volume_fill_list.set_state(["none"] * 6 + ["tet"])
fault_tolerant.update_region_settings.filter_category.set_state("Identified Regions")
fault_tolerant.update_region_settings.all_region_leakage_size_list.set_state([""])
fault_tolerant.update_region_settings.all_region_mesh_method_list.set_state(["wrap"])
fault_tolerant.update_region_settings.all_region_name_list.set_state(["fluid-region-1"])
fault_tolerant.update_region_settings.all_region_overset_componen_list.set_state(["no"])
fault_tolerant.update_region_settings.all_region_type_list.set_state(["fluid"])
fault_tolerant.update_region_settings.all_region_volume_fill_list.set_state(["hexcore"])
fault_tolerant.update_region_settings.all_region_leakage_size_list.set_state([""])
fault_tolerant.update_region_settings.all_region_mesh_method_list.set_state(["wrap"])
fault_tolerant.update_region_settings.all_region_name_list.set_state(["fluid-region-1"])
fault_tolerant.update_region_settings.all_region_overset_componen_list.set_state(["no"])
fault_tolerant.update_region_settings.all_region_type_list.set_state(["fluid"])
fault_tolerant.update_region_settings.all_region_volume_fill_list.set_state(["tet"])
fault_tolerant.update_region_settings()
(8)选择网格控制选项
fault_tolerant.choose_mesh_control_options()
(9)生成面网格
fault_tolerant.generate_surface_mesh()
(10)更新边界类型
fault_tolerant.update_boundaries_ftm()
(11)添加边界层
fault_tolerant.add_boundary_layer_ftm.bl_control_name.set_state("aspect-ratio_1")
fault_tolerant.add_boundary_layer_ftm.insert_compound_child_task()
fault_tolerant.add_boundary_layer_ftm_child_1()
(12)生成体网格
fault_tolerant.create_volume_mesh.all_region_name_list.set_state(["main","flow_pipe","outpipe3","object2","object1","void-region-1","fluid-region-1",])
fault_tolerant.create_volume_mesh.all_region_size_list.set_state(["11.33375"] * 7)
fault_tolerant.create_volume_mesh.all_region_volume_fill_list.set_state(["none"] * 6 + ["tet"])
fault_tolerant.create_volume_mesh()
(13)切换至求解模式
solver_session = meshing_session.switch_to_solver()
2.1.3 2D meshing workflow
使用二维网格划分工作流程对特定二维几何体进行网格划分。以下示例展示了如何使用二维网格划分工作流程。
(1)导入几何模型
import ansys.fluent.core as pyfluent
from ansys.fluent.core import examplesimport_file_name = examples.download_file('NACA0012.fmd', 'pyfluent/airfoils')
meshing_session = pyfluent.launch_fluent(mode=pyfluent.FluentMode.MESHING, precision=pyfluent.Precision.DOUBLE, processor_count=2
)
two_dim_mesh = meshing_session.two_dimensional_meshing()two_dim_mesh.load_cad_geometry_2d.file_name = import_file_name
two_dim_mesh.load_cad_geometry_2d.length_unit = "mm"
two_dim_mesh.load_cad_geometry_2d.refaceting.refacet = False
two_dim_mesh.load_cad_geometry_2d()
(2)设置区域和边界
two_dim_mesh.update_boundaries_2d.selection_type = "zone"
two_dim_mesh.update_boundaries_2d()
(3)定义全局网格尺寸
two_dim_mesh.define_global_sizing_2d.curvature_normal_angle = 20
two_dim_mesh.define_global_sizing_2d.max_size = 2000.0
two_dim_mesh.define_global_sizing_2d.min_size = 5.0
two_dim_mesh.define_global_sizing_2d.size_functions = "Curvature"
two_dim_mesh.define_global_sizing_2d()
(4)添加BOI
two_dim_mesh.add_local_sizing_2d.add_child = "yes"
two_dim_mesh.add_local_sizing_2d.boi_control_name = "boi_1"
two_dim_mesh.add_local_sizing_2d.boi_execution = "Body Of Influence"
two_dim_mesh.add_local_sizing_2d.boi_face_label_list = ["boi"]
two_dim_mesh.add_local_sizing_2d.boi_size = 50.0
two_dim_mesh.add_local_sizing_2d.boi_zoneor_label = "label"
two_dim_mesh.add_local_sizing_2d.draw_size_control = True
two_dim_mesh.add_local_sizing_2d.add_child_and_update(defer_update=False)
(5)设置边的尺寸
two_dim_mesh.add_local_sizing_2d.add_child = "yes"
two_dim_mesh.add_local_sizing_2d.boi_control_name = "edgesize_1"
two_dim_mesh.add_local_sizing_2d.boi_execution = "Edge Size"
two_dim_mesh.add_local_sizing_2d.boi_size = 5.0
two_dim_mesh.add_local_sizing_2d.boi_zoneor_label = "label"
two_dim_mesh.add_local_sizing_2d.draw_size_control = True
two_dim_mesh.add_local_sizing_2d.edge_label_list = ["airfoil-te"]
two_dim_mesh.add_local_sizing_2d.add_child_and_update(defer_update=False)
(6)设置曲率尺寸
two_dim_mesh.add_local_sizing_2d.add_child = "yes"
two_dim_mesh.add_local_sizing_2d.boi_control_name = "curvature_1"
two_dim_mesh.add_local_sizing_2d.boi_curvature_normal_angle = 10
two_dim_mesh.add_local_sizing_2d.boi_execution = "Curvature"
two_dim_mesh.add_local_sizing_2d.boi_max_size = 2
two_dim_mesh.add_local_sizing_2d.boi_min_size = 1.5
two_dim_mesh.add_local_sizing_2d.boi_scope_to = "edges"
two_dim_mesh.add_local_sizing_2d.boi_zoneor_label = "label"
two_dim_mesh.add_local_sizing_2d.draw_size_control = True
two_dim_mesh.add_local_sizing_2d.edge_label_list = ["airfoil"]
two_dim_mesh.add_local_sizing_2d.add_child_and_update(defer_update=False)
(7)添加边界层
two_dim_mesh.add_2d_boundary_layers.add_child = "yes"
two_dim_mesh.add_2d_boundary_layers.bl_control_name = "aspect-ratio_1"
two_dim_mesh.add_2d_boundary_layers.number_of_layers = 4
two_dim_mesh.add_2d_boundary_layers.offset_method_type = "aspect-ratio"
two_dim_mesh.add_2d_boundary_layers.add_child_and_update(defer_update=False)
(8)生成(面)网格
# NOTE: Setting `show_advanced_options = True` is required to configure advanced preferences.
# This dependency may be removed in a future release as the API evolves.
two_dim_mesh.generate_initial_surface_mesh.surface_2d_preferences.show_advanced_options = True
two_dim_mesh.generate_initial_surface_mesh.surface_2d_preferences.merge_edge_zones_based_on_labels = "no"
two_dim_mesh.generate_initial_surface_mesh.surface_2d_preferences.merge_face_zones_based_on_labels = "no"
two_dim_mesh.generate_initial_surface_mesh()two_dim_mesh.add_2d_boundary_layers_child_1.revert()
two_dim_mesh.add_2d_boundary_layers_child_1.add_child = "yes"
two_dim_mesh.add_2d_boundary_layers_child_1.bl_control_name = "uniform_1"
two_dim_mesh.add_2d_boundary_layers_child_1.first_layer_height = 2
two_dim_mesh.add_2d_boundary_layers_child_1.number_of_layers = 4
two_dim_mesh.add_2d_boundary_layers_child_1.offset_method_type = "uniform"
two_dim_mesh.add_2d_boundary_layers_child_1()# NOTE: Setting `show_advanced_options = True` is required to configure advanced preferences.
# This dependency may be removed in a future release as the API evolves.
two_dim_mesh.generate_initial_surface_mesh.surface_2d_preferences.show_advanced_options = True
two_dim_mesh.generate_initial_surface_mesh.surface_2d_preferences.merge_edge_zones_based_on_labels = "no"
two_dim_mesh.generate_initial_surface_mesh.surface_2d_preferences.merge_face_zones_based_on_labels = "no"
two_dim_mesh.generate_initial_surface_mesh()
关于meshing workflow的操作详见官方的介绍,不做描述。
2.2 基于.jou录制脚本的处理
具体操作如下,简言之,就是开始录制 → 开始你的操作 → 结束录制:

之后使用python程序来执行jou文件 → py文件,这样就可以直接使用python执行网格生成的操作。
下面的代码使用了ttkbootstrap UI库(因为tkinter UI界面略显古老),同时可以使用pyinstaller工具将python代码打包成可执行程序,如若不想使用终端命令操作,可以下载 auto-py-to-exe 来打包,也可用批处理程序,新建run.bat:
pyinstaller -F -i 图标.ico -n 名字 --noconsol --noconfirm jou2py.py
执行程序之前确保安装相关工具:
pip install pyinstallerpip install tk:python版本在3.1以上,tkinter库其作为标准库的一部分已经内置pip install ttkbootstrap
转换工具程序代码(我是菜鸡,AI生成)
import ttkbootstrap as ttk
from ttkbootstrap.constants import *
from ttkbootstrap.dialogs import Messagebox
import os
import re
import tkinter as tk
from tkinter import filedialog, scrolledtextclass JouFileProcessor:def __init__(self, root):self.root = rootself.root.title("Jou to Py by Code_WSS")self.root.geometry("800x600")# 设置样式self.style = ttk.Style()# 显示ttkbootstrap版本信息self.show_ttk_version()# 设置中文字体支持self.style.configure(".", font=("SimHei", 10))# 创建主题切换区域self.create_theme_switcher()# 创建主界面组件self.create_widgets()def show_ttk_version(self):"""显示ttkbootstrap版本信息"""try:ttk_version = ttk.__version__print(f"ttkbootstrap版本: {ttk_version}")version_frame = ttk.Frame(self.root)version_frame.pack(fill=X, padx=10, pady=2)ttk.Label(version_frame,text=f"ttkbootstrap版本: {ttk_version}",font=("SimHei", 8)).pack(anchor=E)except Exception as e:print(f"获取ttkbootstrap版本失败: {str(e)}")def get_supported_themes(self):"""获取支持的主题"""try:return self.style.theme_names()except Exception as e:print(f"获取主题列表失败: {e}")return ["cosmo", "flatly", "darkly"]def create_theme_switcher(self):"""创建主题切换组件"""theme_frame = ttk.Frame(self.root)theme_frame.pack(pady=5, padx=10, fill=X, anchor=N)ttk.Label(theme_frame, text="主题设置:").pack(side=LEFT, padx=5)# 获取支持的主题列表self.themes = self.get_supported_themes()self.theme_var = tk.StringVar(value=self.style.theme_use())self.theme_combobox = ttk.Combobox(theme_frame,textvariable=self.theme_var,values=self.themes,state="readonly",width=20)self.theme_combobox.pack(side=LEFT, padx=5)self.theme_combobox.bind("<<ComboboxSelected>>", self.apply_theme)def apply_theme(self, event=None):"""应用选中的主题"""try:selected_theme = self.theme_var.get()if selected_theme not in self.themes:Messagebox.show_warning("警告", f"不支持的主题: {selected_theme}")returnself.style.theme_use(selected_theme)self.root.update_idletasks()self.root.update()Messagebox.show_info("操作成功", f"主题已成功切换为: {selected_theme}")except Exception as e:error_msg = f"切换主题失败: {str(e)}\n建议升级ttkbootstrap到最新版本"print(error_msg)Messagebox.show_error("切换失败", error_msg)def create_widgets(self):"""创建界面组件"""# 文件选择区域file_frame = ttk.LabelFrame(self.root, text="文件选择", padding=10)file_frame.pack(fill=X, padx=10, pady=5)self.file_path = tk.StringVar()ttk.Entry(file_frame, textvariable=self.file_path, width=50).pack(side=LEFT, padx=5, fill=X, expand=True)browse_btn = ttk.Button(file_frame, text="浏览文件", command=self.browse_file, bootstyle=SECONDARY)browse_btn.pack(side=LEFT, padx=5)process_btn = ttk.Button(file_frame, text="处理文件", command=self.process_file, bootstyle=SUCCESS)process_btn.pack(side=LEFT, padx=5)# 日志显示区域log_frame = ttk.LabelFrame(self.root, text="处理日志", padding=10)log_frame.pack(fill=BOTH, padx=10, pady=5, expand=True)self.log_text = scrolledtext.ScrolledText(log_frame,wrap=tk.WORD,height=15)self.log_text.pack(fill=BOTH, expand=True)self.log_text.config(state=tk.DISABLED)# 状态栏self.status_var = tk.StringVar(value="就绪")status_bar = ttk.Label(self.root,textvariable=self.status_var,anchor=W,padding=5,relief=SUNKEN)status_bar.pack(side=BOTTOM, fill=X)def browse_file(self):file_path = filedialog.askopenfilename(title="选择Jou文件",filetypes=[("Jou文件", "*.jou"), ("所有文件", "*.*")])if file_path:self.file_path.set(file_path)self.update_status(f"已选择文件: {os.path.basename(file_path)}")def process_file(self):file_path = self.file_path.get()if not file_path:Messagebox.show_warning("警告", "请先选择文件")returnif not os.path.exists(file_path):Messagebox.show_error("错误", "文件不存在")returntry:output_file = self.convert_jou_to_py(file_path)self.update_status(f"处理完成: {os.path.basename(output_file)}", "green")Messagebox.show_info("成功", f"文件转换成功\n保存至: {output_file}")except Exception as e:self.update_status(f"处理失败: {str(e)}", "red")Messagebox.show_error("错误", f"处理文件时出错: {str(e)}")def convert_jou_to_py(self, input_file):self.update_info(f"开始转换文件: {os.path.basename(input_file)}\n")self.update_info(f"输入文件路径: {input_file}\n")output_dir = os.path.dirname(input_file)filename = os.path.splitext(os.path.basename(input_file))[0]output_file = os.path.join(output_dir, f"{filename}_converted.py")with open(input_file, "r", encoding="utf-8") as infile:lines = infile.readlines()self.update_info(f"读取到 {len(lines)} 行内容\n")processed_lines = []output_mesh_file = Nonefor line in lines:if line.strip().startswith("/file/set-tui-version"):continueif line.strip() == "(newline)":continueif line.strip().startswith("(cx-gui-do"):continueif "(%py-exec" in line:if line.endswith('")\n'):line = line[:-3] + "\n"elif line.endswith('")'):line = line[:-2]line = re.sub(r'\(\%py-exec\s*"', "mesh.", line)if line.strip().startswith("/file/write-mesh"):match = re.search(r'"([^"]+)"', line)if match:filename = match.group(1)if filename.endswith(".gz"):filename = filename[:-3]output_mesh_file = filenameline = f'mesh.meshing.File.WriteMesh(r"{filename}")\n'if line.strip() == "/exit":line = "mesh.exit()\n"processed_lines.append(line)header_lines = ["import ansys.fluent.core as pyfluent\n",'mesh = pyfluent.launch_fluent(mode="meshing", precision="double", processor_count=2)\n\n',]footer_lines = ["\nmesh.meshing.File.WriteMesh()\n" if not output_mesh_file else "","mesh.exit()\n",]with open(output_file, "w", encoding="utf-8") as outfile:outfile.writelines(header_lines)outfile.writelines(processed_lines)outfile.writelines(footer_lines)self.update_info(f"转换成功: {os.path.basename(input_file)} → {os.path.basename(output_file)}\n")self.update_info(f"输出文件路径: {output_file}\n")self.update_info("=" * 50 + "\n\n")return output_filedef update_info(self, message):self.log_text.config(state=tk.NORMAL)self.log_text.insert(tk.END, message)self.log_text.see(tk.END)self.log_text.config(state=tk.DISABLED)def update_status(self, message, color="black"):self.status_var.set(message)self.style.configure("TLabel", foreground=color)if __name__ == "__main__":app = ttk.Window(themename="cosmo")processor = JouFileProcessor(app)app.mainloop()
软件界面如图:
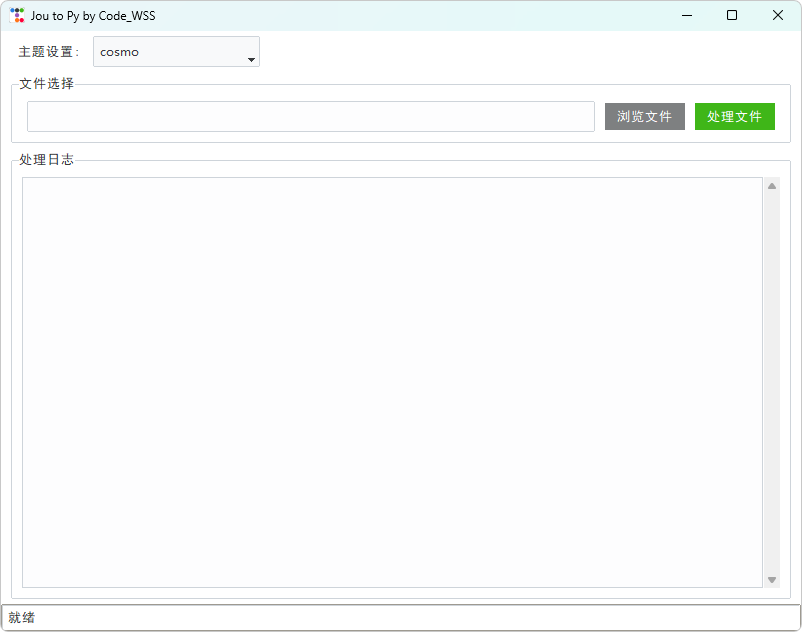
输入.jou文件,自动生成.py文件,生成之后,在终端直接执行python test.py即可调用fluent实现你的想法。
3 参考文章
[1] Pyfluent 安装
[2] Pyfluent meshing flow
[3] 胡老师的pyfluent资料1
[4] 胡老师的pyfluent资料2


